Back in 2017 I was seeing Advent Knitting packs being shown all over the internet/instagram and I was intrigued.
So in 2018 I found Dingo Dyeworks, an Australian wool dyer in Perth and Sweet Georgia Yarns in the USA who are only a two of the many of producers of Advent Kits around the world.
I also realised that Ambah O'Brien, (knitwear designer) designed a wrap for the Advent Kits in 2018, so I signed up for Ambah's Newsletter and fell into the rabbit hole of the Advent boards in her group on Ravelry.
In July Ambah O'Brien opened up a board in her group "ADVENTurer KAL 2018" which shared links to all the Advents Kits that were available and I ended up purchasing two kits -
Dingo Dyeworks
which I emptied out of the box it came in into a nice cane basket I had at home.
Sweet Georgia Yarns
Ambah had also designed the ADVENTurer Scarf & Wrap pattern so I purchased this and decided to use the Dingo Dyeworks kit first.
It was fun to open a box each day, but my knitting wasn't as quick, but I did manage to cast-on on 1 December and do a few rows.
by 4 December I had only started my Day 2's colour.
It was interesting to see the new colours each day and I finally finished knitting it on 4 January 2019.
but I didn't get a chance to block it until 13 January where Katniss decided to help.
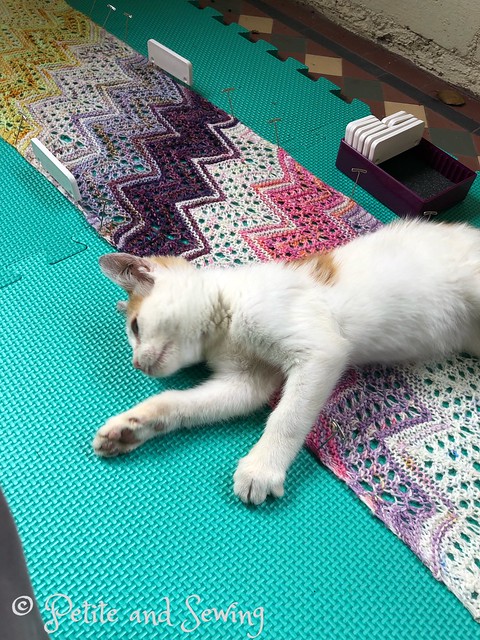
Here it is draped along the front fence.
I haven't had a chance to wear it yet and I am not 100% certain about the colours, only time will tell if it will get worn when the weather cools down.
The Sweet Georgia Advent kit is still waiting for me but first I have a couple of the knitting projects I need to finish.
The 2019 pre-orders for this years kits is up already on Ambah's page. I am trying not to look!!
Sunday, May 5, 2019
Sunday, April 28, 2019
Shorts!
As any reader of this blog will know I have been on the quest for pants that I am happy with the fit for a long, long time.
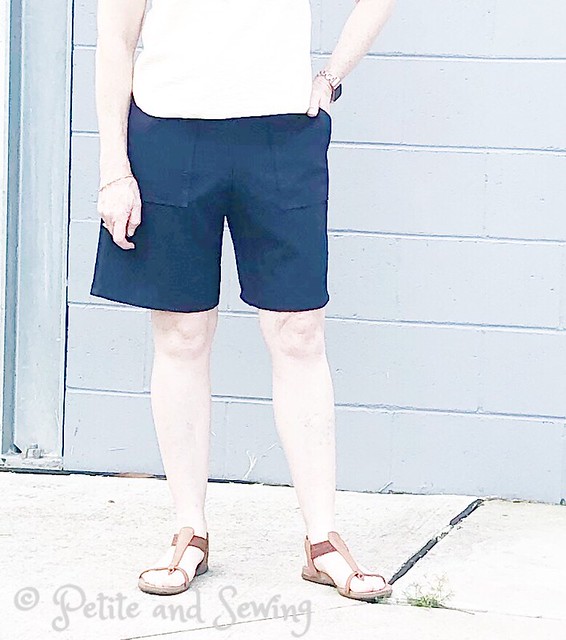
Well at last I think I am on the right track and made this pair of shorts to see how the fit was so far.
I will share more of the pattern adjustments when I make pants, which I hope will be sometime soon but life is getting in the way of sewing at the moment.
These shorts did start out as the Ellen Woven Shorts by Style Arc but I soon realised that the fabric that I had found in my stash was not going to be drapey enough, so I then changed them to my adjusted pants draft that I made at the Australian Sewing Guild Convention in Melbourne last year.
During this process I also realised these would be for dog walking/working around the yard so the Ellen Woven Shorts pockets were then added. It looks like I have misaligned one of the pockets as it is pulling/visible at the front leg,
but I'm certain Tomba won't mind at all.
Here are some very washed out photos of the shorts so you can see the fit better.
My first fabric purchase for the year is 3 metres of brown polyester suiting, as I have decided to take part in the Australian Sewing Guild Pleated Garment Sew-Along I just hope my idea works out!
******************
2019 Stash Out: 3.3 m
2019 Stash In: 3 m
Well at last I think I am on the right track and made this pair of shorts to see how the fit was so far.
I will share more of the pattern adjustments when I make pants, which I hope will be sometime soon but life is getting in the way of sewing at the moment.
These shorts did start out as the Ellen Woven Shorts by Style Arc but I soon realised that the fabric that I had found in my stash was not going to be drapey enough, so I then changed them to my adjusted pants draft that I made at the Australian Sewing Guild Convention in Melbourne last year.
During this process I also realised these would be for dog walking/working around the yard so the Ellen Woven Shorts pockets were then added. It looks like I have misaligned one of the pockets as it is pulling/visible at the front leg,
but I'm certain Tomba won't mind at all.
Here are some very washed out photos of the shorts so you can see the fit better.
![]() |
| I'm pretty sure it is the pocket that is causing the pulling. |
My first fabric purchase for the year is 3 metres of brown polyester suiting, as I have decided to take part in the Australian Sewing Guild Pleated Garment Sew-Along I just hope my idea works out!
******************
2019 Stash Out: 3.3 m
2019 Stash In: 3 m
Sunday, February 17, 2019
Delicate Nothings
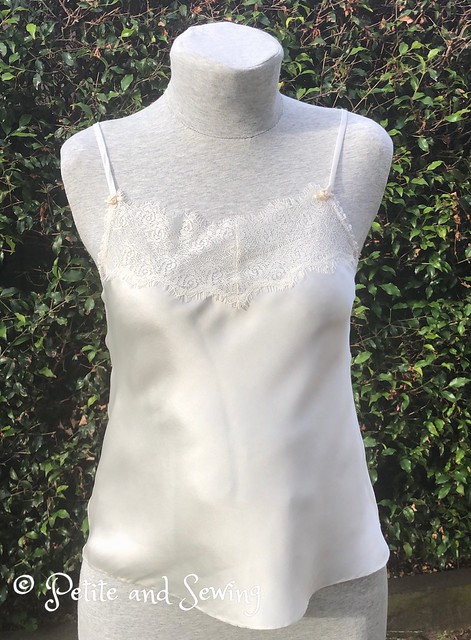
One of the classes I attended at the Australian Sewing Guild Convention in Melbourne last year was a class with Tatyana Anderson, called Silk Camisoles that was a 1/2 day course.
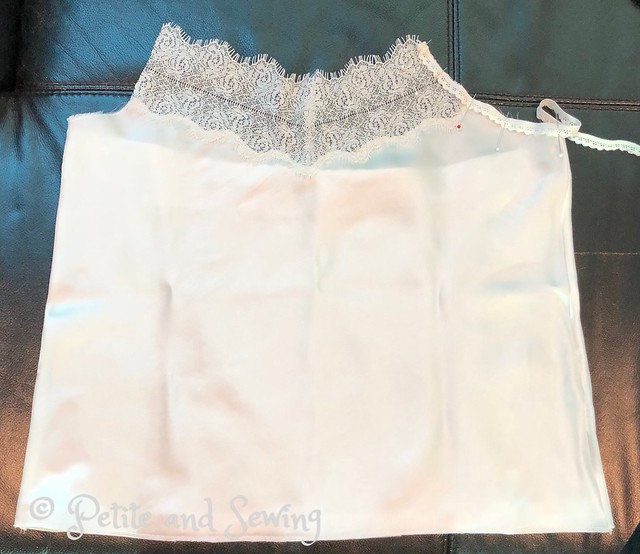
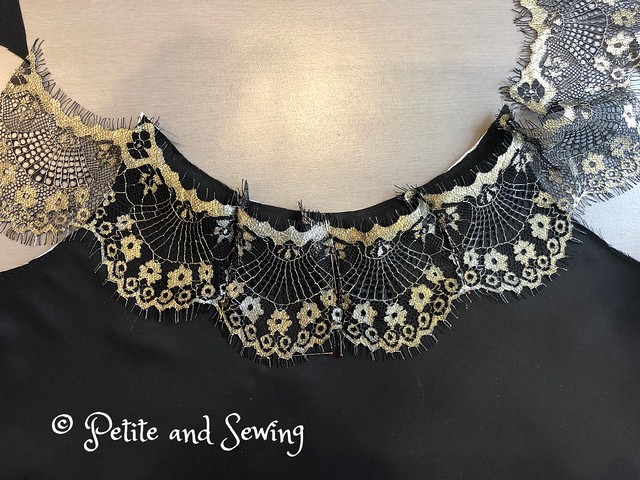
Thankfully Tatyana and her staff had cut out our silk and stablised it so we could get started on the placement of our lace straight away.
At the end of the 1/2 day I did have my lace sewn in place, the side seams french seamed and the elastic pinned in place along one edge of the front armhole.
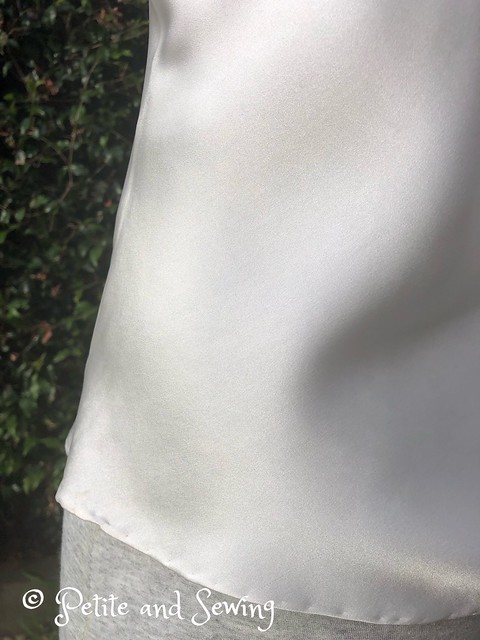
During a couple of ASG group meetings I worked on this to finish the elastic and also to hand roll the hem,
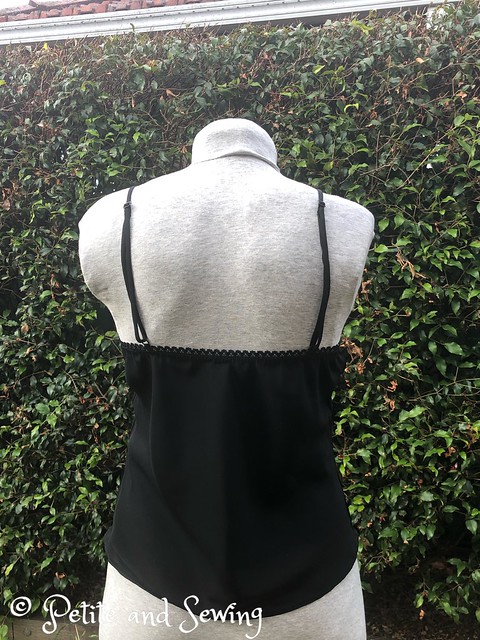
as I couldn't get a nice finish by machine and then finished the straps.
This is where it was up to when I found out that Tatyana was holding a 2 day workshop in Sydney. I jumped at the chance to do this, as we hadn't really dealt with the initial preparation and cutting out of the silk and this is skill I want to work more on.
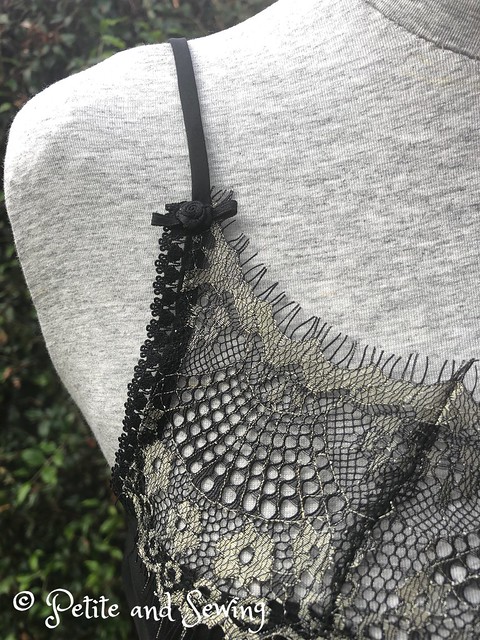
During the workshop Tatyana pinned my cream straps in place and I was able to sew these in place during the class as well.
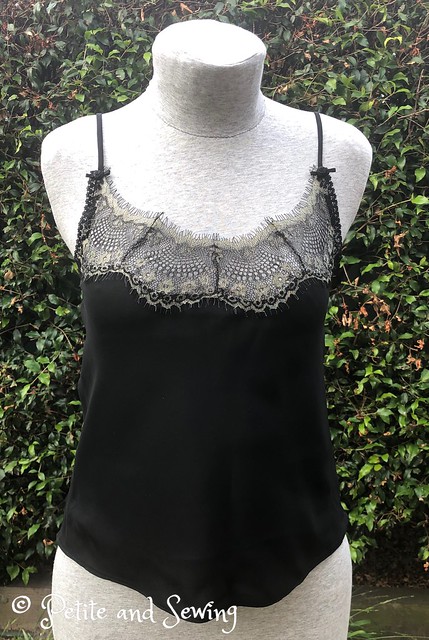
Surprisingly to my fellow attendees I had chosen a black silk with a black and gold lace kit.
We set about laying out our pattern pieces on the silk and cutting it out before we started playing with the lace placement.
Seeing I had made a "v" neck for the cream camisole, Tatyana suggested I make this one a round neck which worked perfectly with my lace.
French seams are used and this time I was successful in getting a lovely machine rolled hem.
I was very pleased to get this finished within the 2 days of the workshop.
******************
Thankfully Tatyana and her staff had cut out our silk and stablised it so we could get started on the placement of our lace straight away.
At the end of the 1/2 day I did have my lace sewn in place, the side seams french seamed and the elastic pinned in place along one edge of the front armhole.
During a couple of ASG group meetings I worked on this to finish the elastic and also to hand roll the hem,
as I couldn't get a nice finish by machine and then finished the straps.
This is where it was up to when I found out that Tatyana was holding a 2 day workshop in Sydney. I jumped at the chance to do this, as we hadn't really dealt with the initial preparation and cutting out of the silk and this is skill I want to work more on.
During the workshop Tatyana pinned my cream straps in place and I was able to sew these in place during the class as well.
Surprisingly to my fellow attendees I had chosen a black silk with a black and gold lace kit.
We set about laying out our pattern pieces on the silk and cutting it out before we started playing with the lace placement.
Seeing I had made a "v" neck for the cream camisole, Tatyana suggested I make this one a round neck which worked perfectly with my lace.
French seams are used and this time I was successful in getting a lovely machine rolled hem.
I was very pleased to get this finished within the 2 days of the workshop.
******************
Sunday, February 10, 2019
Lemon slub knit top with shirt tail hem
This is another version of KS 3740 in a lemon slub knit that was in the stash.
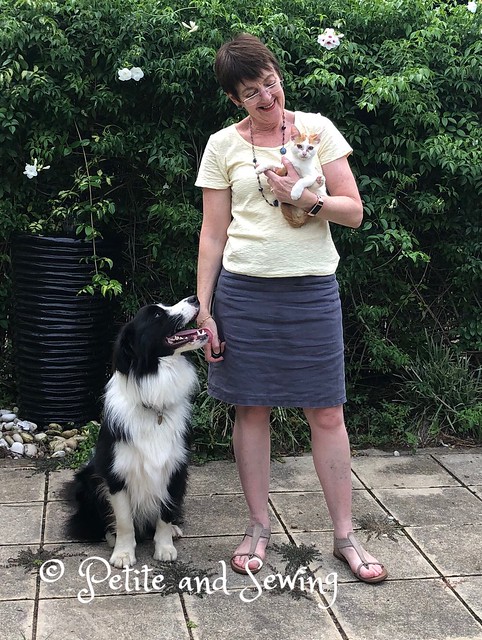
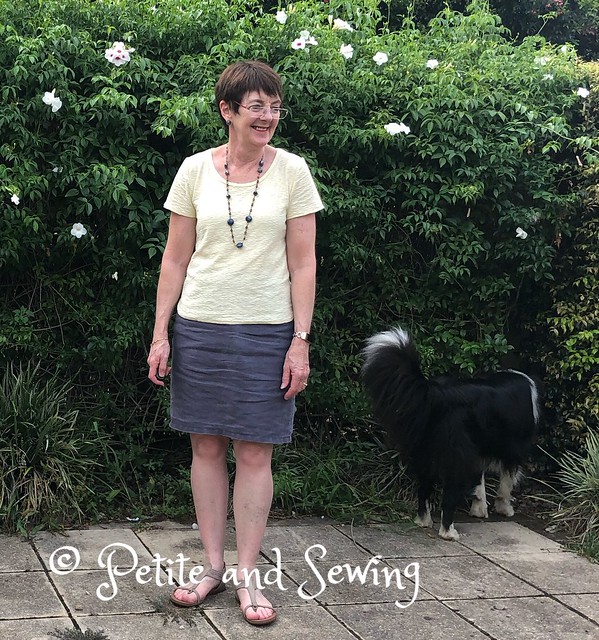
I would also like to introduce you to Katniss our new family member. This is why Tomba is in nearly every photo as he is busy trying to find out where she is in the hedge.
Now to change up a plain t-shirt I decided to use the downloaded shirt-tail hem extension from Christine Jonson Patterns that I had downloaded sometime last year that has been sitting in my KS3740 pattern folder waiting for me to remember to use it.
So finally I got to play with it.
My t-shirt length is long meaning I usually cut off around 7cm depending on the fabric drape, so I already had some length built into my pattern to play with.
You make your t-shirt as normal until the side seams, so I used the binder on my Coverstitch for the neckband,
and then used the chain stitch on my Coverstitch to baste the side seams together so I could work out the length of my top and the point I wanted the split to occur.
I then machine stitched my side seams, stopping 6cm from the hem, where I pressed open the seam allowances and then had Mark level the front and back hems.
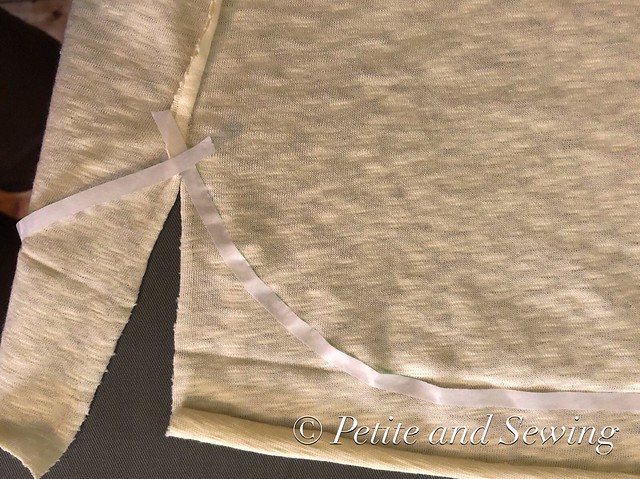
Once this was done, I pressed the hems and then used the shirt-tail hem extension to draw in the shaped hem with a FriXion pen.
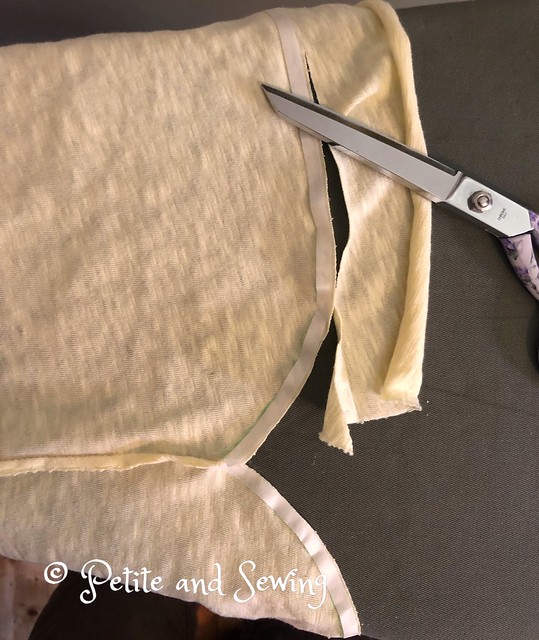
Then with some 6mm Steam A Seam I finger pressed this around right at the outside edge the hem allowance,
and then trimmed the fabric back so I only had a 6mm hem allowance.
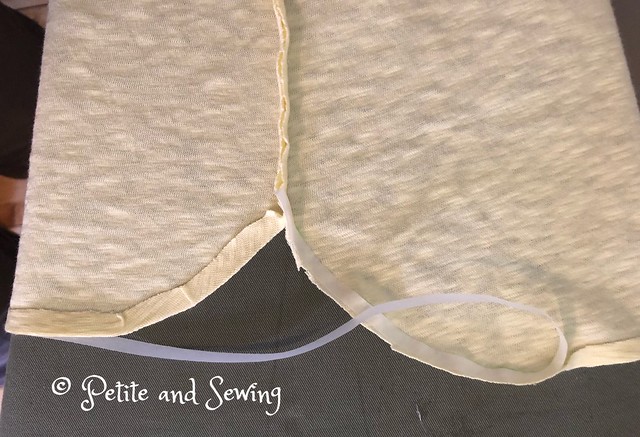
which I then carefully removed the backing tape from the Steam A Seam and finger pressed the hem in place
so it was ready to be taken over to the Coverstitch to finish the body and sleeve hems.
Front view minus Katniss
Side view
Back view
This is my 2nd piece for SWAP 2019.
******************
2019 Stash Out: 2.3 m
2019 Stash In: 0 m
I would also like to introduce you to Katniss our new family member. This is why Tomba is in nearly every photo as he is busy trying to find out where she is in the hedge.
So finally I got to play with it.
My t-shirt length is long meaning I usually cut off around 7cm depending on the fabric drape, so I already had some length built into my pattern to play with.
You make your t-shirt as normal until the side seams, so I used the binder on my Coverstitch for the neckband,
and then used the chain stitch on my Coverstitch to baste the side seams together so I could work out the length of my top and the point I wanted the split to occur.
I then machine stitched my side seams, stopping 6cm from the hem, where I pressed open the seam allowances and then had Mark level the front and back hems.
Once this was done, I pressed the hems and then used the shirt-tail hem extension to draw in the shaped hem with a FriXion pen.
Then with some 6mm Steam A Seam I finger pressed this around right at the outside edge the hem allowance,
and then trimmed the fabric back so I only had a 6mm hem allowance.
which I then carefully removed the backing tape from the Steam A Seam and finger pressed the hem in place
so it was ready to be taken over to the Coverstitch to finish the body and sleeve hems.
Front view minus Katniss
Side view
Back view
This is my 2nd piece for SWAP 2019.
******************
2019 Stash Out: 2.3 m
2019 Stash In: 0 m
Sunday, February 3, 2019
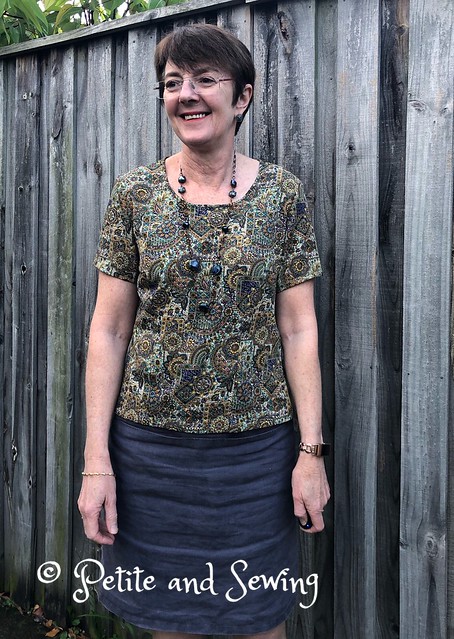
Multi muted V8572
I thought this blouse was finished a while ago but it was one of those that wasn’t quite right.
The fabric was in my stash and I can't remember where I purchased it from but the colours in it means I can wear it with navy, brown and olive skirts.
I ended up doing a burn test to work out what it might be and it is pure polyester although I find it quite comfortable to wear in the heat we have been having recently and it drapes well.
I have:
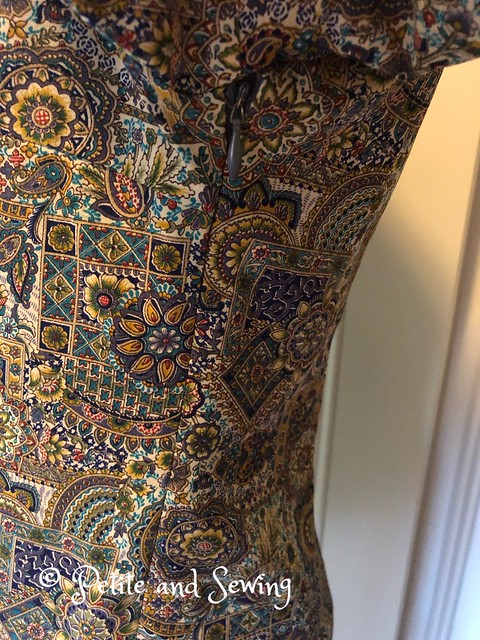
- put an invisible zip in the left hand side seam
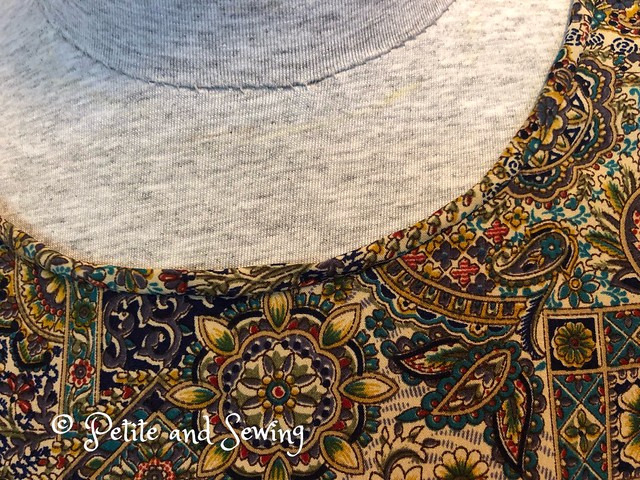
- a tiny bias neckband, stitched on by machine and then handstitched in place
I wore it a couple of times and it just didn't look right and finally realised it was too long, only by 1cm but that perfect length was not there.
So I took the hem up and I thought I had a new top to wear. Not so!
On my pattern I had noted to shorten the back darts after seeing the pictures of this top, however I also did the same to the front darts (my blog post did say back only) which was a mistake as the top was falling away from my body, not a look that I like.
The top sat around for a few more weeks before I lengthened the front darts into the hem. I am glad I persisted in getting this right as it has been a great addition to my wardrobe.
*****************
2019 Stash Out: 1.5 m
2019 Stash In: 0 m
The fabric was in my stash and I can't remember where I purchased it from but the colours in it means I can wear it with navy, brown and olive skirts.
I ended up doing a burn test to work out what it might be and it is pure polyester although I find it quite comfortable to wear in the heat we have been having recently and it drapes well.
I have:
- put an invisible zip in the left hand side seam
- a tiny bias neckband, stitched on by machine and then handstitched in place
I wore it a couple of times and it just didn't look right and finally realised it was too long, only by 1cm but that perfect length was not there.
So I took the hem up and I thought I had a new top to wear. Not so!
On my pattern I had noted to shorten the back darts after seeing the pictures of this top, however I also did the same to the front darts (my blog post did say back only) which was a mistake as the top was falling away from my body, not a look that I like.
The top sat around for a few more weeks before I lengthened the front darts into the hem. I am glad I persisted in getting this right as it has been a great addition to my wardrobe.
*****************
2019 Stash Out: 1.5 m
2019 Stash In: 0 m
Thursday, January 31, 2019
2018 in review

was a year of sewing for me, but unfortunately not garment sewing.
As I highlighted last year the renovations we did, meant that the curtains were not going to work with the new colour scheme so I decided to make them for the whole house, 5 windows and 2 very large french doors.
Don't get me wrong I did manage to do a bit of garment sewing and that is probably why the curtains took 9 months to complete.
Knitting and jewellery making ended up being my sanity savers.
Hits
- changing the sleeve length on V8648 made this dress very wearable.
- another DVF Wrap Dress, has been worn a number of times and I can see it being worn a lot more.
Highlights
- another 3 classes with Susan Khalje in Sydney
- winning viewers choice at the Australian Sewing Guild Convention Dinner held in Melbourne in August for my V8648 dress.
- In November I toured Tasmania with 12 other yarn crazy ladies and had a fabulous time.
- completed the curtains and I'm very happy with them.
![]() |
| Lounge room curtains |
Reflections
I've realised that I get caught up in too many shiny things and in 2019 I need to be a lot more aware of this and take stock before I jump in.
That is why I still have 2 Little French Jackets, 1 Couture Skirt and 1 Couture Silk Blouse to complete, time is something I struggle with.
I didn't manage to be effective with my #MakeNine plans with only 1 garment completed even though I did sew 3 garments (one of them was was V1247 for "#MakeNine), knitted 2 scarfs and made 3 pieces of jewelry.
My stash in and out this year is 6.4 metres out and 18.6 metres added and this includes fabric for the classes with Susan Khalje as well as lycra for the swimwear course I attended earlier this month which are close to being finished and some Dintex for a jacket for Mark and I which if you follow me on IG you would have already seen.
I didn't manage to be effective with my #MakeNine plans with only 1 garment completed even though I did sew 3 garments (one of them was was V1247 for "#MakeNine), knitted 2 scarfs and made 3 pieces of jewelry.
My stash in and out this year is 6.4 metres out and 18.6 metres added and this includes fabric for the classes with Susan Khalje as well as lycra for the swimwear course I attended earlier this month which are close to being finished and some Dintex for a jacket for Mark and I which if you follow me on IG you would have already seen.
Goals
As mad as it sounds after reading my comments above, I plan on doing SWAP again in 2019 as it will fill my wardrobe with necessary garments in a quick time frame which have either worn out or been stained beyond recovery.
*************************
I'm not sure if blogging is alive or dead these days, but I do like to blog simply for the added information that you can't share via IG.
I would like to thank everyone who visits and those that comment, I know life is hectic and I myself have been remiss in commenting but plan to get back into reading and commenting on the blogs that I enjoy.
Here is the collage of my makes for 2018.
I do have a few pieces to blog about, so hope to see you soon.
Tuesday, December 11, 2018
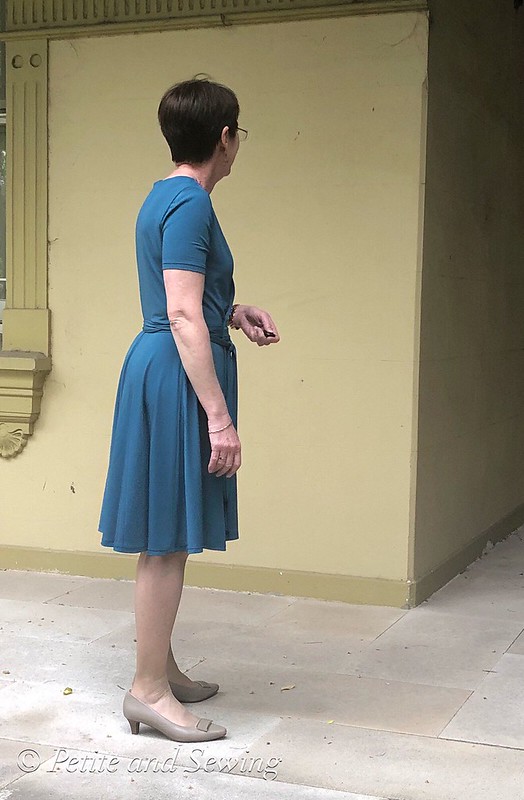
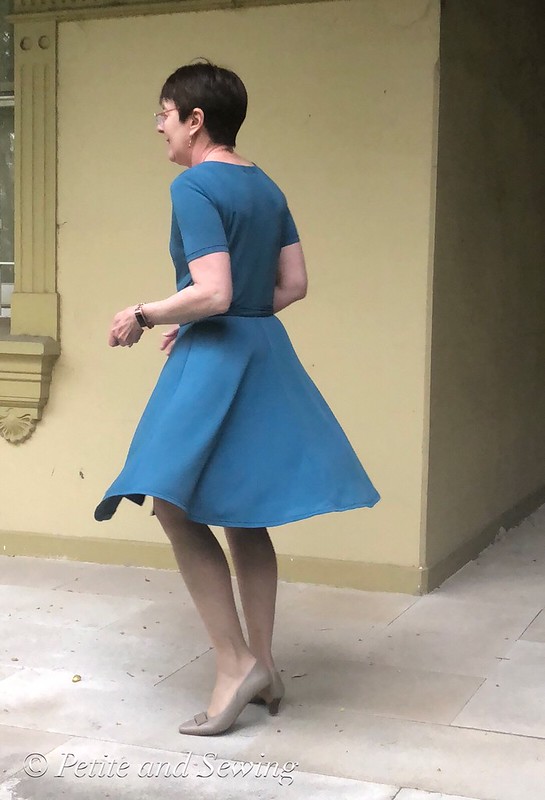
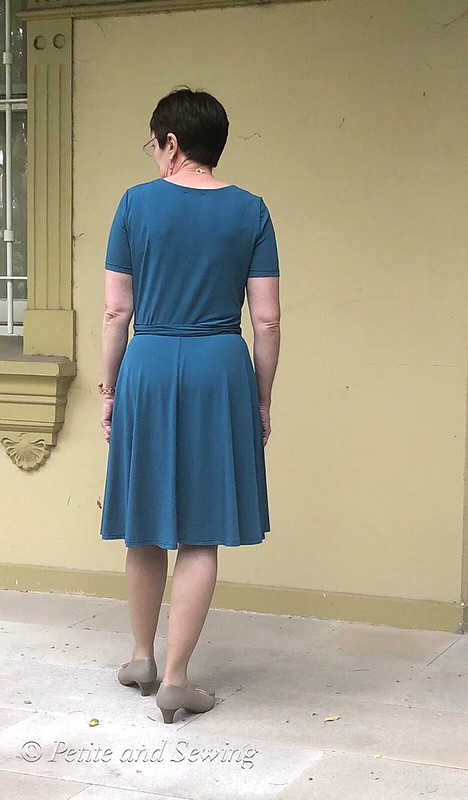
Turbulent Sea DVF Wrap Dress
You know when you purchase your ticket for Frocktails and then it dawns on you, "what am I going to wear".
Of course I left it to the last minute but with a sewing weekend coming up I decided to make another DVF Wrap Dress with this dry knit that was in the stash.
Just before all this happened the ladies over at Artisan Square had a Pre-2019 SWAP Dress Challenge that had to include a new fabric or new technique.
As this knit is heavier than my previous DVF dress, I decided to add a waist-stay which is a technique I have never used and I found this very detailed post over at Stitch N Smile.
The next thing I did was to do a gaposis adjustment in the front neckline of 1cm, this has made the front neckline sit much better.
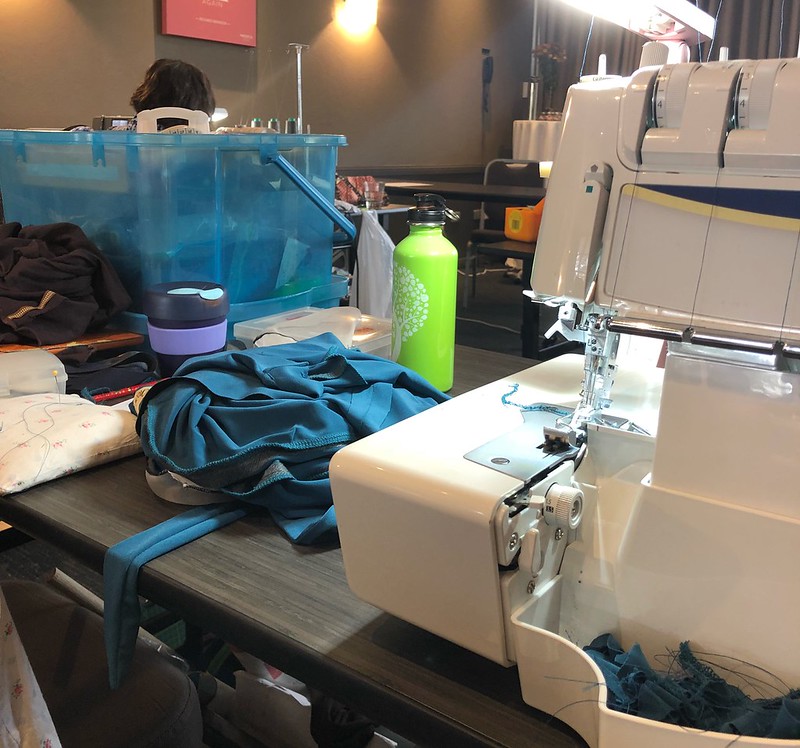
So armed with all my sewing goodies I headed off for a weekend of sewing.
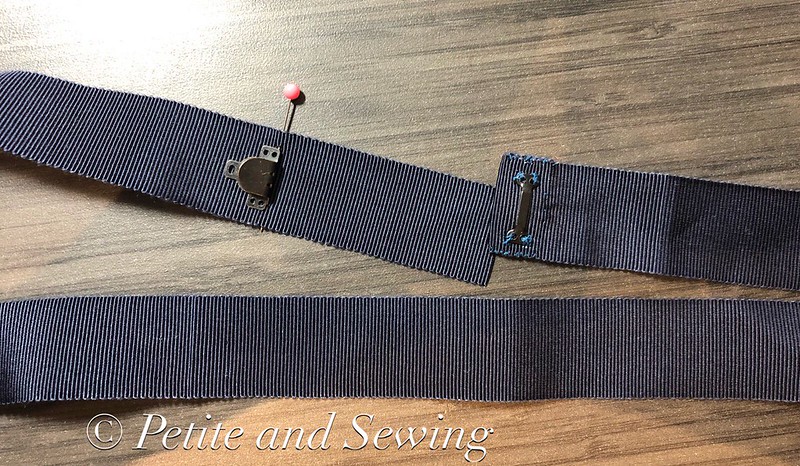
To make the waist-stay I used some navy petersham ribbon I had purchased from Torb and Reiner and a trouser hook and bar.
Then I realised I had to add a buttonhole to the waist-stay as one of the ties for dress has to pass through the side seam,
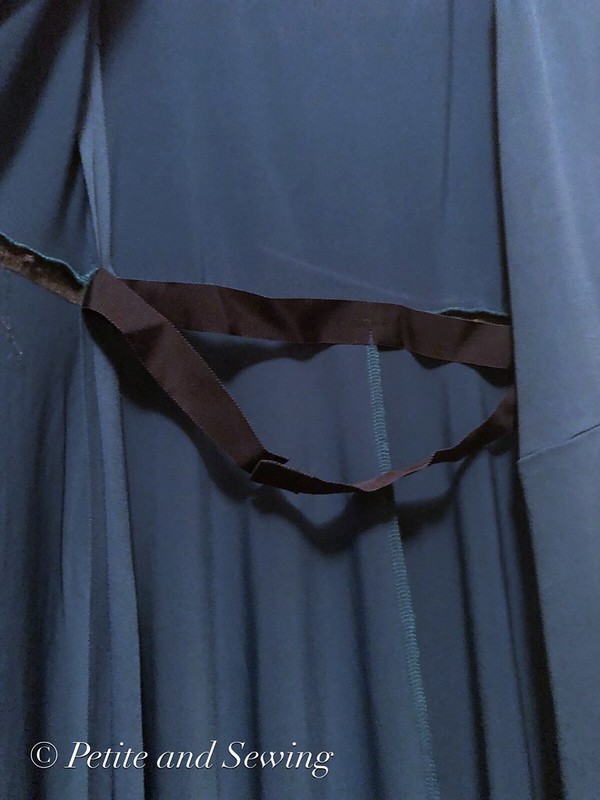
where I attached the waist-stay to the dress and I had positioned the hook and bar to be offset to be on the other side away from the tie on the outside.
By the end of the 2nd day of sewing the dress just needed hemming and thankfully Mark was on hand that evening to level off the hem so I could use my coverstich to finish the hems that night.
This dress is getting a lot of wear besides Frocktails and I can see it getting a lot more with summer finally arriving.
******************
2018 Stash Out: 6.3 m
2018 Stash In: 5.0 m
Of course I left it to the last minute but with a sewing weekend coming up I decided to make another DVF Wrap Dress with this dry knit that was in the stash.
![]() |
| Thank you James Broadway |
As this knit is heavier than my previous DVF dress, I decided to add a waist-stay which is a technique I have never used and I found this very detailed post over at Stitch N Smile.
The next thing I did was to do a gaposis adjustment in the front neckline of 1cm, this has made the front neckline sit much better.
So armed with all my sewing goodies I headed off for a weekend of sewing.
To make the waist-stay I used some navy petersham ribbon I had purchased from Torb and Reiner and a trouser hook and bar.
Then I realised I had to add a buttonhole to the waist-stay as one of the ties for dress has to pass through the side seam,
where I attached the waist-stay to the dress and I had positioned the hook and bar to be offset to be on the other side away from the tie on the outside.
By the end of the 2nd day of sewing the dress just needed hemming and thankfully Mark was on hand that evening to level off the hem so I could use my coverstich to finish the hems that night.
This dress is getting a lot of wear besides Frocktails and I can see it getting a lot more with summer finally arriving.
This will also be my first garment for SWAP 2019 as "One garment may be completed by today (28 October 2018) US Time Zone.
2018 Stash Out: 6.3 m
2018 Stash In: 5.0 m
Labels:
Couture,
Coverstitch,
DVF Wrap Dress,
Frocktails,
Knit,
SWAP 2019,
Vogue 1548,
Wasit-Stay
Subscribe to:
Posts (Atom)