Tuesday, May 25, 2010

Not much sewing going on.....

May is turning into a month of hemming projects and preparation, but no actual garment sewing.

As you saw in my last post I have been busy shortening hems on my t-shirts, and have finished another 5 since (1 of mine, 2 for my DM, 1 for my DS and 1 for a friend of DM's) and then DH hands over two pairs of work pants that need hemming as well (1 pair is still hiding in the sewing room LOL).

Then last Saturday at our monthly ASG meeting at Rhodes, Angie Zimmerman* talked to us about Chanel Jackets and then proceeded to help us adjust our patterns.

This was the prompting I needed to start the Chanel jacket that I talked about here.

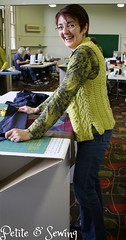
I wore the Chanel jacket that I made about 3 years ago so Angie could see where it was overlapping at the top of the centre front, and the adjustment was a 0.5mm tuck in the neckline tapering to zero at the bust point.


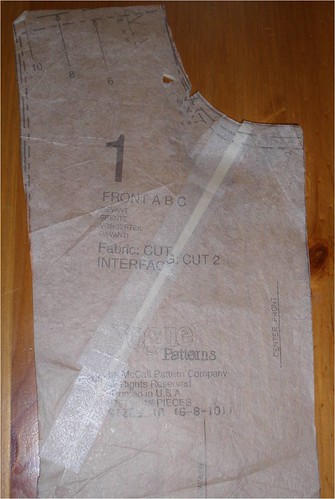
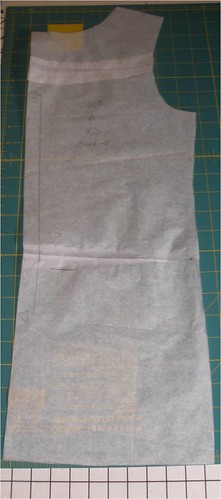
The remainder of the day was spent cutting out the tweed and interfacing. Yes I am going to interface the whole jacket with Sheerweft just to give it a little more body and keep the tweed together. This is as far as I got on this project.

This week I am preparing 4 patterns to take to Brisbane with me on Friday for a long weekend to attend a Fitting Workshop with Alison Wheeler** and maybe by Monday I will have some garments to show you, so keep your fingers crossed.

*Angie Zimmerman writes a lot of articles for Sewing with Stitches Australia (formerly Australian Stitches) and also has her own sewing workshops.

**Alison Wheeler operates her own sewing school, "The Sewing Lady", in Brisbane. She is an experienced dressmaker and teacher offering a wealth of knowledge and information to her students across a wide range of sewing techniques.

Thursday, May 13, 2010

How to spend a Saturday

One of the reasons I purchased the Janome CP 1000 was to help me get a more professional hem on my purchased t-shirts when I shortened them as they are always too long.

As the Sydney weather has suddenly taken a quick trip south in temperature, I need tops desparately so the other Saturday instead of going to one of the two ASG Groups I go to I bit the bullet and got stuck into this job.

It took me most of the day because I probably do it a lot more labour intensive than it needs to be, however this system worked for me.

  • First of all I tried on all the tops and pinned the hem where I wanted it to be.
  • Measured the turned up amount, deducted 2cm from this and cut the remaining hem off.
  • Pressed up the 2cm hem.
  • Glued the hem in place.
  • Wound the 3 bobbins to use in the Bob N' Serge and threaded the machine.
  • Stitched the hems.
  • Finished.

  • I now have 7 t-shirts that are the correct length.


    The amount I shortened these t-shirts varied by brand ranging from 5cm to 8cm and that is not including the hem amount.

    I have also made a note in my notebook of how much to wind on the bobbins for each hem as I'm sure this will be a job I have to do again.

    Saturday, May 1, 2010

    Cardi for me

    After making Mum's cardi and top, I decided I had better get my act together and make mine.

    I had some brown Mercury Jersey from Lincraft that was waiting for its turn, so the other week, after reading a couple of reviews on PR (got to love that place if you want to save yourself some frustration) I started on this project.

    I didn't do any adjustments to the Cardi pattern and only did some of my normal adjustments to the top e.g.:

    High Round back and Sway Back.


    Then I did the front neck gaposis and also continued this through the front neck facing.


    • I read yorkshire lass's review and she did her “layout of the fronts single layer as directed but chalked the position of the first one onto the fabric then fit the other one around the chalked line. This way I got the two fronts way closer together than the layout suggests is possible”. This worked well for me as well and it made it a lot easier to cut out the front pieces as well.
    • I read some of the others reviews and decided to follow their leads and not sew the elastic in the back neck area. Instead, I gathered this area down to 5”. Then I sewed the back collar facing to the neck seam so the facing would stay down on the inside. This created a very stable collar so I don't need to fuss when I put it on and it stays in place.
    • I deepened the armholes for both the Cardi and Top by 2cm (7/8") and the sleeves fitted in nicely.
    • I made View D of the Cardi Wrap so I can't do any of the wraps. I am wondering if I should shorten the cardi as I shortened the top by 5cm (2").

    So here is the top with my skirt from the Mini Wardrobe


    and now with the cardi


    Another one of the challenges for the 2010 SWAP at Stitcher's Guild was that a garment will feature embroidery, beads or sashiko.

    This is not something I have tried before and looking at the RTW it is everywhere.

    Now Alison, one of my sewing buddies has the Professional Touch Applicator Wand and has just used it to add the bling to her daugters dress and shoes.

    Well Alison has kindly offered to let me test drive before I purcahse this Wand and to help me along further Alison also kindly purchased for me at the Craft Expo in March two packs of Nail Heads. Here is what I came up with yesterday playing with the nailheads and I think I will do this when I catch up with Alison again and when I figure out how to mark the pattern on the neckband so it looks correctly spaced.


    Oh I forgot to tell you that I have had some labels made to put into my garments. It is supposed to encourage me to finish my garments in a more professional way, unfortunately I can't find a brown sharpie to hide the fact that I used cream overlocking thread LOL.