It is great when you see a friend sew an item that you think would be perfect for your own use.
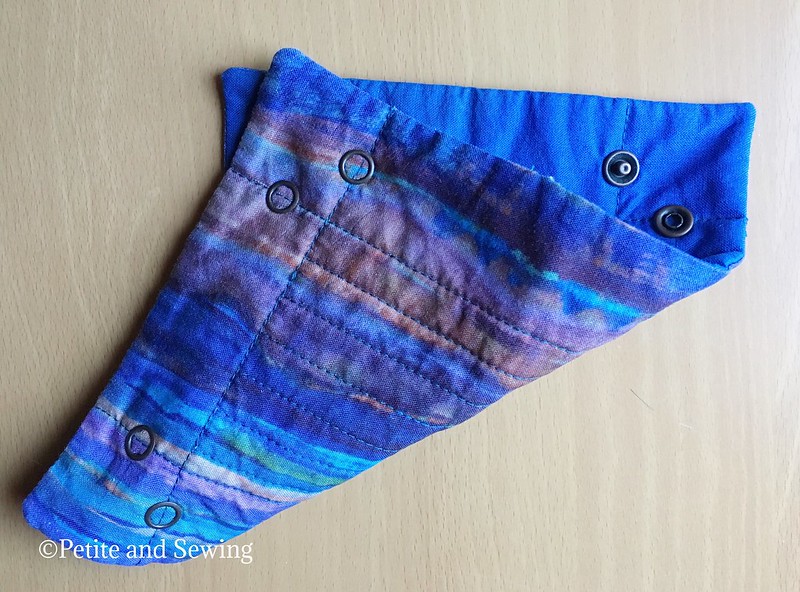
Cassiy posted this cute Travel Tray by Angie's Bits 'n Pieces that she is going to use at her ASG meetings to collect the fees for the day.
Then it dawned on me that this would be the perfect travelling item for me, as wherever I go, I always seem to struggle to find a place for my watch, bracelet, earrings and necklace when I take them off for the day.
I still had a bit of the Xanadu Purple Haze that I used for my Take Off Tote as well as the blue quilting cotton so these were used for this tray.
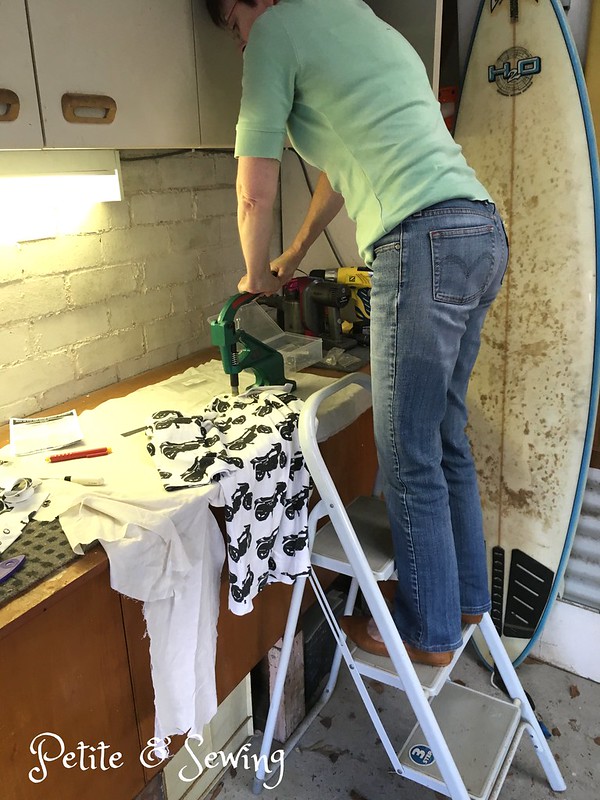
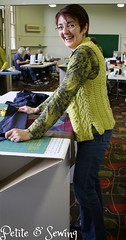
This was my project at our last ASG meeting for the year in 2016, it was all cut out and ready to sew and by the time we stopped for our Christmas Lunch all the sewing was finished, only the snaps were left to do.
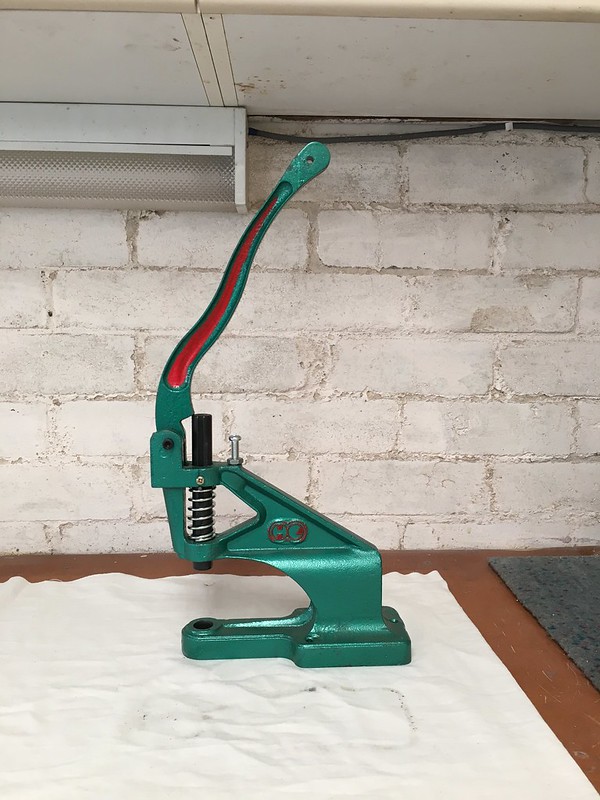
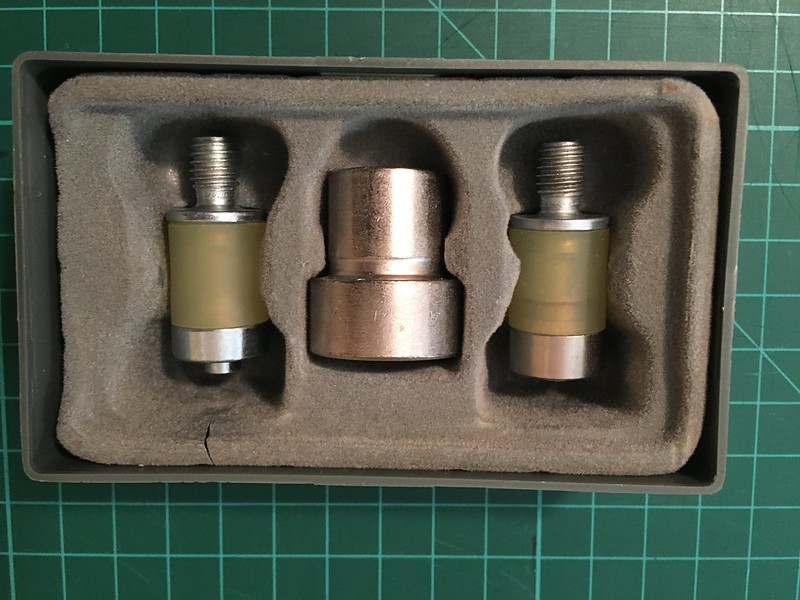
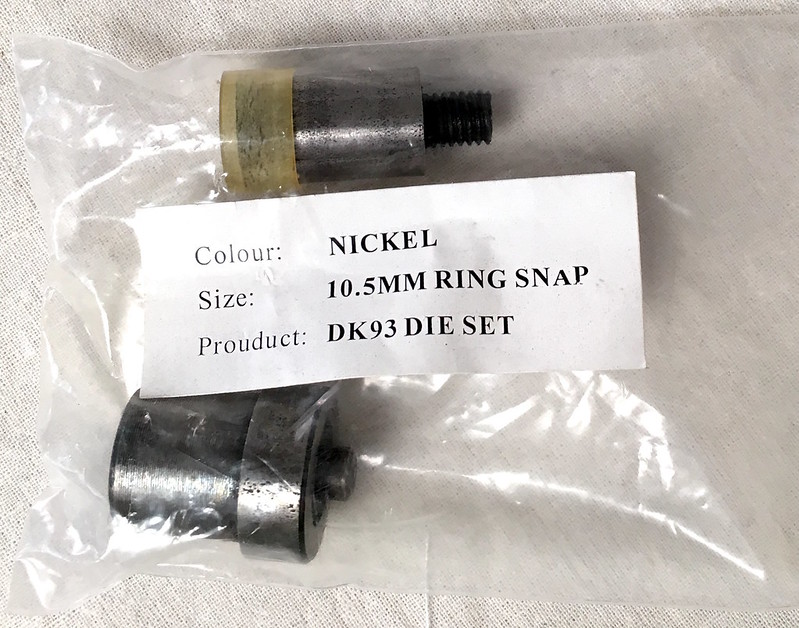
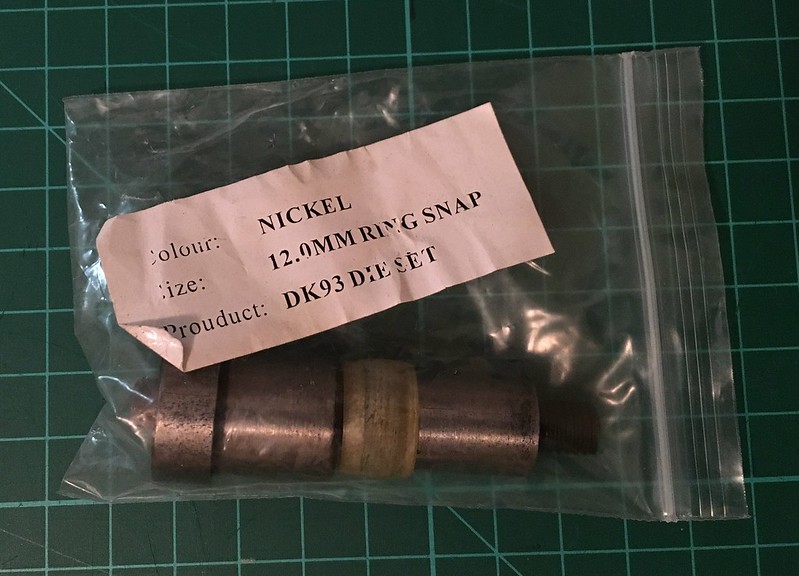
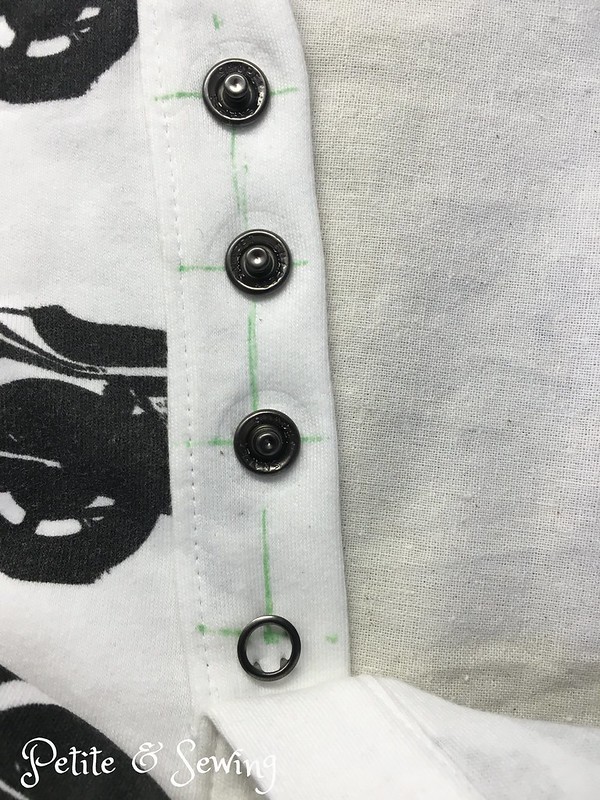
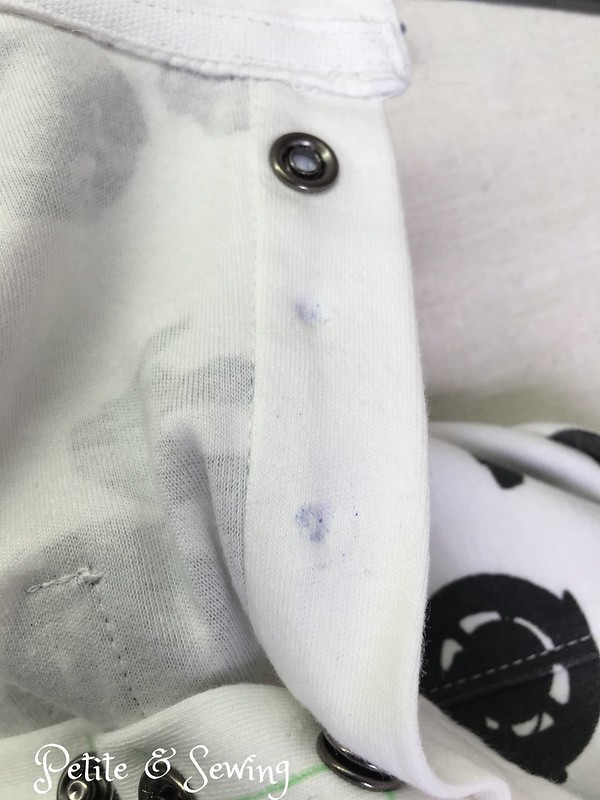
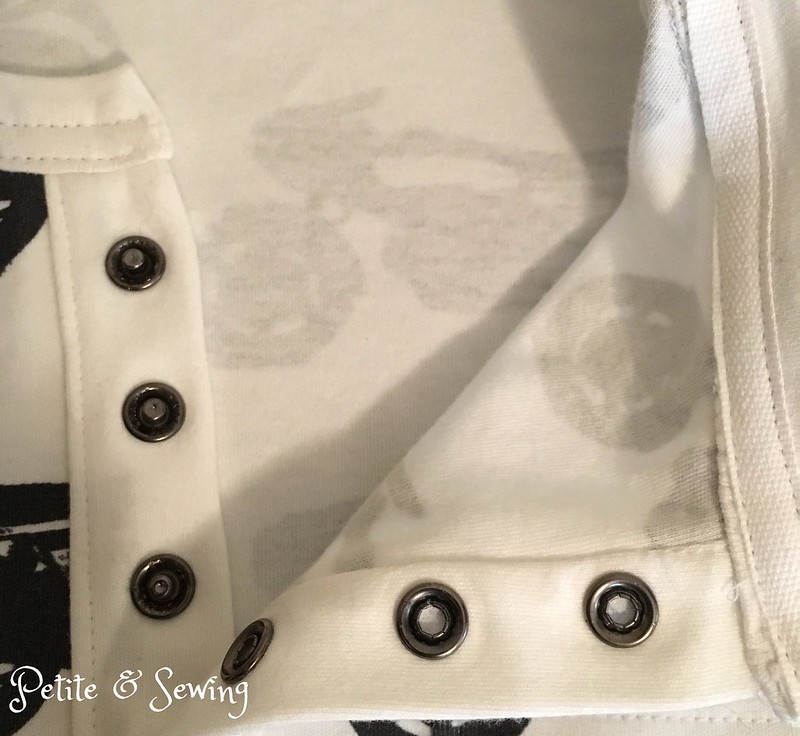
Using my Dk-93 Snap Press and some Snap Source Size 16 Antique Copper Open Prong Ring snap fasteners I installed them on each corner 2cm away from the edge.
It is cute and it is the perfect item for when I travel.
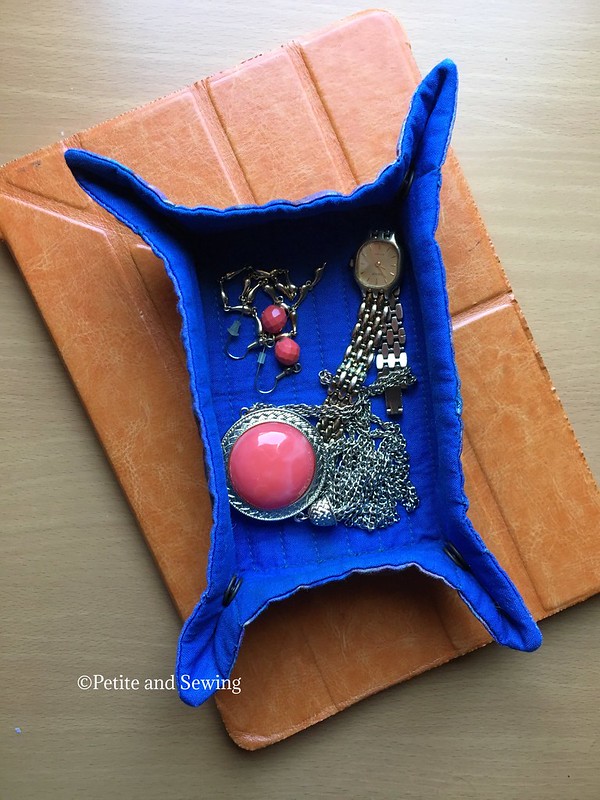
I just wish I had thought about the alignement of the snaps so I could have snapped it together in a tidy manner to pack!
Showing posts with label DK-93. Show all posts
Sunday, September 17, 2017
Sunday, May 15, 2016
DK-93 Manual Snap Press
Back in March I mentioned that I had received the DK-93 Manual Snap Press for Christmas after reading Lena's blog.
Here is it set up on the workbench in the garage ready to be used,
and here are the dies I have acquired to use with it:
From GreenBeans Australia
* DK-93 Size 20 Die Set, this is for the plastic snaps that GreenBeans Australia supplies.
* 10.5mm Nickel Ring Snap
* 12.0mm Nickel Ring snap
Then I ordered from Minkus Margo the following dies:
* Hole Punch die mold
* Jeans Button die
* 9mm Double Cap Rivet and 9.5mm Nipple Rivet
Then last month I got the chance to use my DK-93 press for a special birthday Henley I was making for my BIL.
I wanted to add some snaps to the placket and used the Snap Source Size 16 Smoke Open Prong Ring snap fasteners with the the DK-93 press and the Nickel 10.5mm Ring Snap.
Luckily I had found a great article in Sandra Betzina's Power Sewing ToolBox Volume 1 on page 107 on how to get "Snap Success". Now this is for the Snap Source snap-setting tool however the same principles apply to my application.
I tried a few test samples first and soon realised that standing on the ground next to the DK-93 press wasn't giving me a snap that that I couldn't get my fingernail underneath.
So I searched the web and found that you need to put your whole weight on the arm of the DK-93 press, so I set up a small step ladder and found this set up gave me the perfect snap.
To mark where I wanted the male snaps to be placed I used a green Frixon pen, and then used a prong to mark the spot.
Then to line up the corresponding side of the snap, I rubbed some chalk on the socket and pressed it down onto the opposite side.
and the finished placket.
Now I need to decide if it will be a pair of jeans or a jeans style skirt next to test out some of the other dies.
Here is it set up on the workbench in the garage ready to be used,
and here are the dies I have acquired to use with it:
From GreenBeans Australia
* DK-93 Size 20 Die Set, this is for the plastic snaps that GreenBeans Australia supplies.
* 10.5mm Nickel Ring Snap
* 12.0mm Nickel Ring snap
Then I ordered from Minkus Margo the following dies:
* Hole Punch die mold
![]() |
* 9mm Double Cap Rivet and 9.5mm Nipple Rivet
Then last month I got the chance to use my DK-93 press for a special birthday Henley I was making for my BIL.
I wanted to add some snaps to the placket and used the Snap Source Size 16 Smoke Open Prong Ring snap fasteners with the the DK-93 press and the Nickel 10.5mm Ring Snap.
Luckily I had found a great article in Sandra Betzina's Power Sewing ToolBox Volume 1 on page 107 on how to get "Snap Success". Now this is for the Snap Source snap-setting tool however the same principles apply to my application.
I tried a few test samples first and soon realised that standing on the ground next to the DK-93 press wasn't giving me a snap that that I couldn't get my fingernail underneath.
So I searched the web and found that you need to put your whole weight on the arm of the DK-93 press, so I set up a small step ladder and found this set up gave me the perfect snap.
To mark where I wanted the male snaps to be placed I used a green Frixon pen, and then used a prong to mark the spot.
Then to line up the corresponding side of the snap, I rubbed some chalk on the socket and pressed it down onto the opposite side.
and the finished placket.
Now I need to decide if it will be a pair of jeans or a jeans style skirt next to test out some of the other dies.
Subscribe to:
Posts (Atom)