Here is the latest Index for Volume 22 for Dressmaking with Stitches.
You are more than welcome to download a copy.
I have emailed a copy to Cate Purcell, the editor of Australian Stitches.
Enjoy.
Tuesday, November 29, 2016
Thursday, November 24, 2016
Australian Stitches - Housekeeping
Again I have had to find another host for the Indexes and have chosen to use Open Drive.
All the Indexes are now updated if you would like to download a copy.
All the Indexes are now updated if you would like to download a copy.
Monday, November 14, 2016
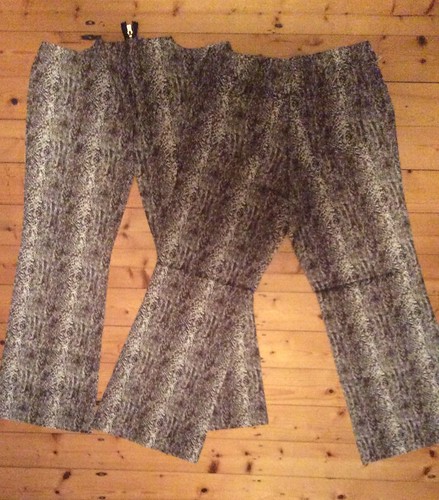
Reptilian Jeans
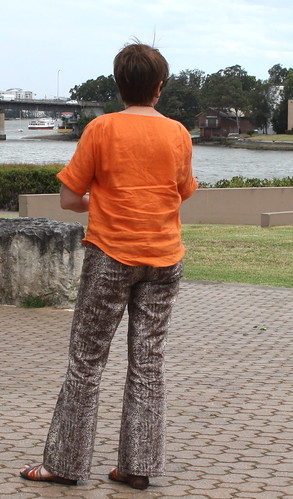
When my sister saw these on me today she complimented the jeans and then said it wasn't a garment she thought I would wear (patterned legs).
I had pinned this from Sportscraft as I had purchased a similar patterned Cotton Sateen from Spotlight back in 2013.
Why Reptilian jeans, well hubby thinks the fabrics looks like snake skin but as I am not fond of them at all, I have decided to call them my Reptilian Jeans!
These were cut out back in September and taken to a sewing day with some Sydney Spoolettes at their Sewing Social day at Bobbin and Ink. I managed to get the front (except pockets) and the back with pockets sewn on the day.
Then they got put aside so I could make my bag.
Their next outing was at a Sewing Weekend with my sewing buddies at the Mercure Parramatta where the pockets were installed, the seams basted together for a fit to check if I needed the extra 2cm I had added to the seams as the Cotton Sateen didn't have the same amount of stretch that my denim usually has.
It worked out that not all of the extra fabric was needed so I ended up using 1.5cm seam allowances.
The jeans then were stitched, overlocked and topstitched ready for the waistband but this time the sewing mojo had disappeared and they sat in my sewing room waiting.
The other weekend the waistband was added, button hole stitched, button sewn on and hems done and they are finally finished.
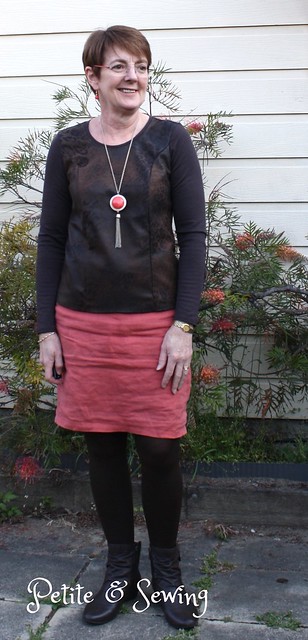
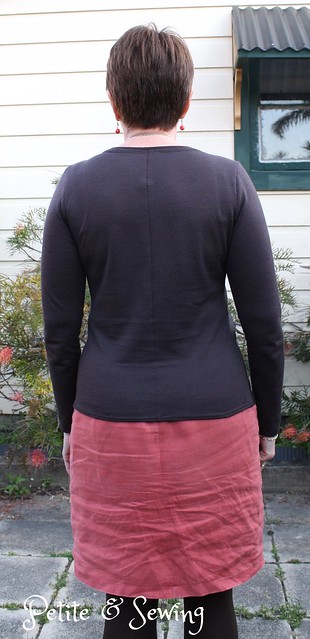
The top I am wearing was gifted to me by my very good friend Dilliander who was not comfortable wearing this orange linen version of V1247 which is perfect for me. The length of this top is perfect to wear with jeans and the only change I have made is to take off about 1.5cm at the centre back hem as I was getting a "duck's tail" after sitting, you can still see it still folds up a bit here.
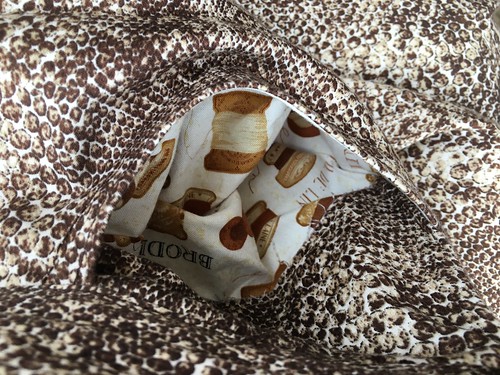
I also used some quilting cotton for the front pockets.
Now I need to make some more plain tops so I can wear these jeans as they are the perfect weight for this time of year.
******************
2016 Stash Out: 15.1 m
2016 Stash In: 18 m
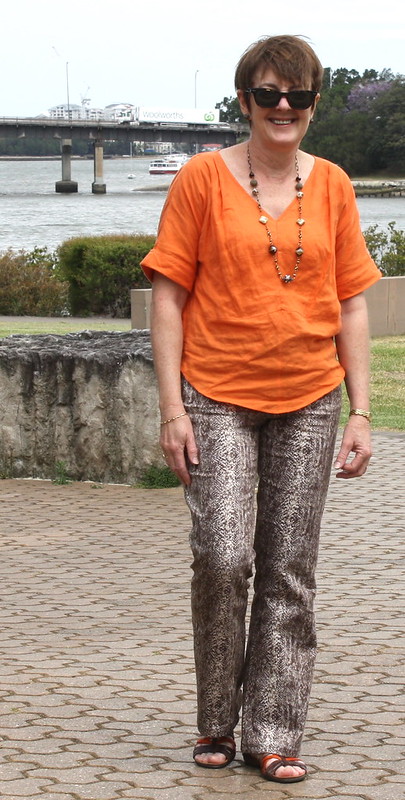 |
| All photos taken by my Sister, thank you. |
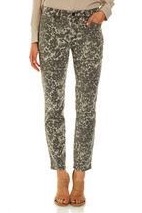 |
| Cleo Twill Ankle Jeans |
Why Reptilian jeans, well hubby thinks the fabrics looks like snake skin but as I am not fond of them at all, I have decided to call them my Reptilian Jeans!
These were cut out back in September and taken to a sewing day with some Sydney Spoolettes at their Sewing Social day at Bobbin and Ink. I managed to get the front (except pockets) and the back with pockets sewn on the day.
Then they got put aside so I could make my bag.
Their next outing was at a Sewing Weekend with my sewing buddies at the Mercure Parramatta where the pockets were installed, the seams basted together for a fit to check if I needed the extra 2cm I had added to the seams as the Cotton Sateen didn't have the same amount of stretch that my denim usually has.
It worked out that not all of the extra fabric was needed so I ended up using 1.5cm seam allowances.
The jeans then were stitched, overlocked and topstitched ready for the waistband but this time the sewing mojo had disappeared and they sat in my sewing room waiting.
The other weekend the waistband was added, button hole stitched, button sewn on and hems done and they are finally finished.
The top I am wearing was gifted to me by my very good friend Dilliander who was not comfortable wearing this orange linen version of V1247 which is perfect for me. The length of this top is perfect to wear with jeans and the only change I have made is to take off about 1.5cm at the centre back hem as I was getting a "duck's tail" after sitting, you can still see it still folds up a bit here.
I also used some quilting cotton for the front pockets.
Now I need to make some more plain tops so I can wear these jeans as they are the perfect weight for this time of year.
******************
2016 Stash Out: 15.1 m
2016 Stash In: 18 m
Sunday, October 16, 2016
Handbag Contest on Pattern Review
At last I have managed to enter a contest this year!
Over at Pattern Review there has been a Handbag Contest going on from 15 September to 15 October 2016.
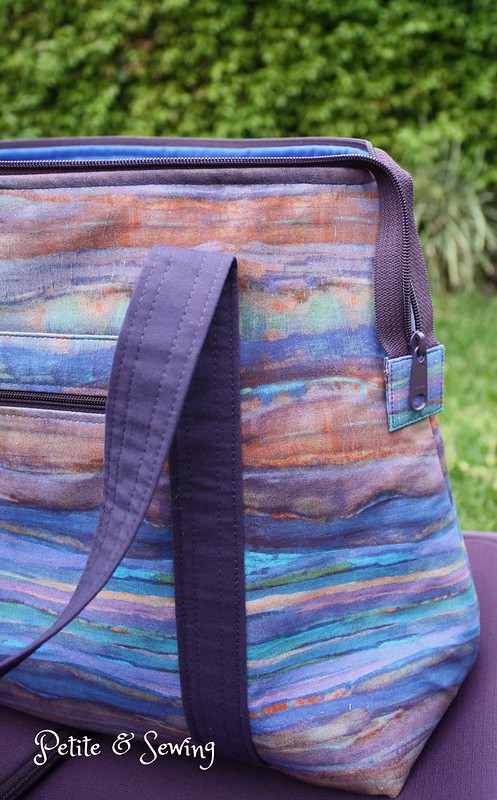
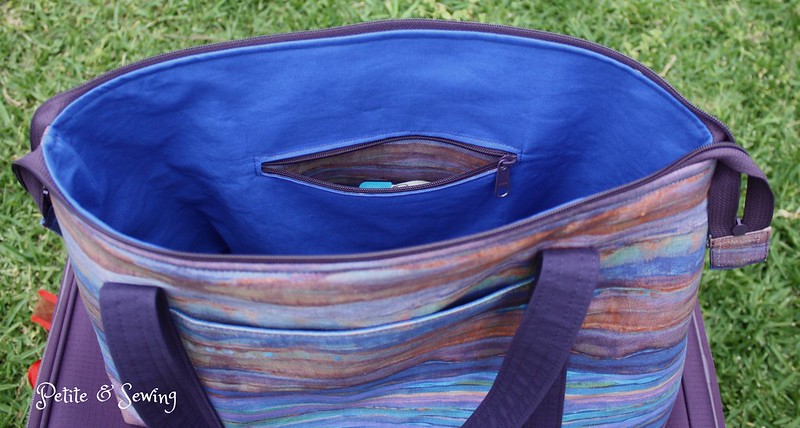
Now I have had my eye on the Take Off Tote from Dog Under My Desk for quite a while now and this was the perfect opportunity to get this made.
I purchased:
* The top zipper now hangs over each end of the bag using the zipper instructions for the Avignon Traveller (location 2715). The zips are from ByAnnie, and are the Zippers by the Yard, which I purchased when I went to Puyallup in February 2016 and I was able to make the top zip double ended.
* Added a zippered pocket on the inside using the Basic Zippered Pocket instructions (location 579 in Pockets).
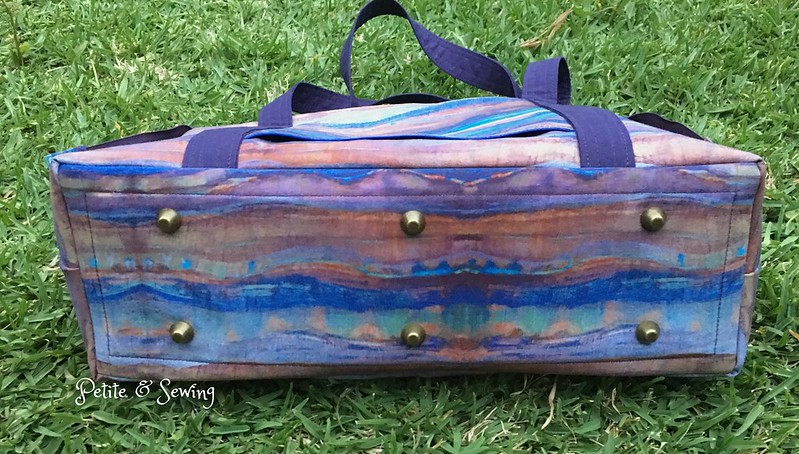
* Added purse feet to the base of the bag using the Structured External Base with Purse Feet instructions (location 1041 in Bases). For the base I used a thin chopping board.
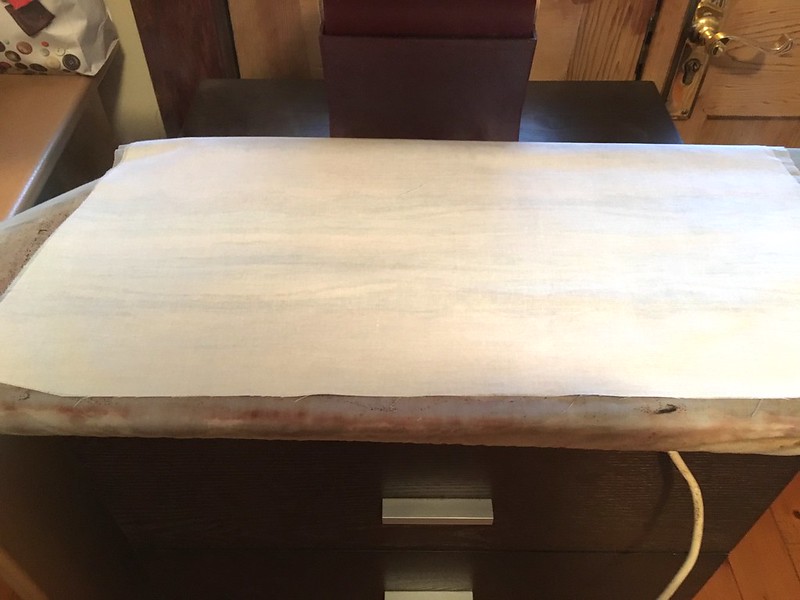
The whole bag and lining are fused with the SF101 and I saved a lot of time doing this with my Elna Press
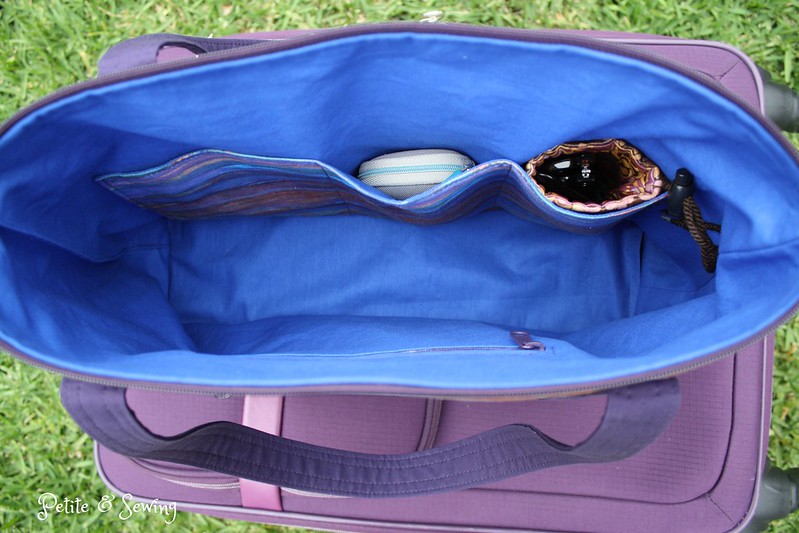
When it came to the inside slip pocket I decided to divide the open pocket into three for my sunglasses case, Boise earphones and mobile phone.
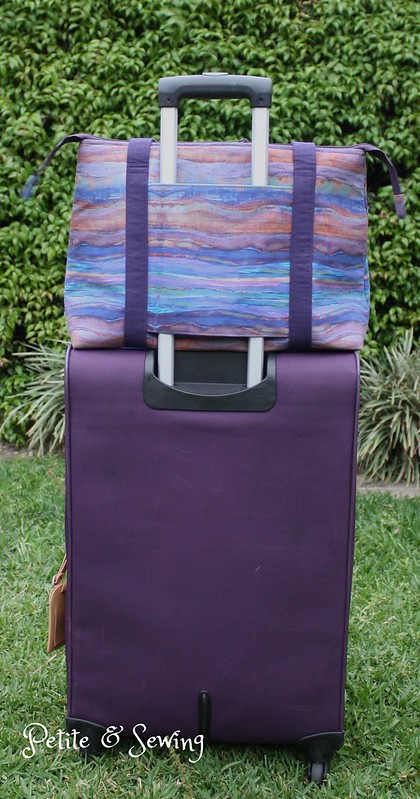
The back of the bag has a fabulous sleeve that slips over the handles of your suitcase. Alternatively you can make it into another pocket.
I also shortened the strap length by 5cm, as most bags tend to drag on the ground and this is a much better length for me.
I took it away for the weekend and was pleasantly surprised at what I could fit into this bag.
Now there is enough fabric for another bag, but it could be a while before you see that one.
Follow my blog with Bloglovin
Over at Pattern Review there has been a Handbag Contest going on from 15 September to 15 October 2016.
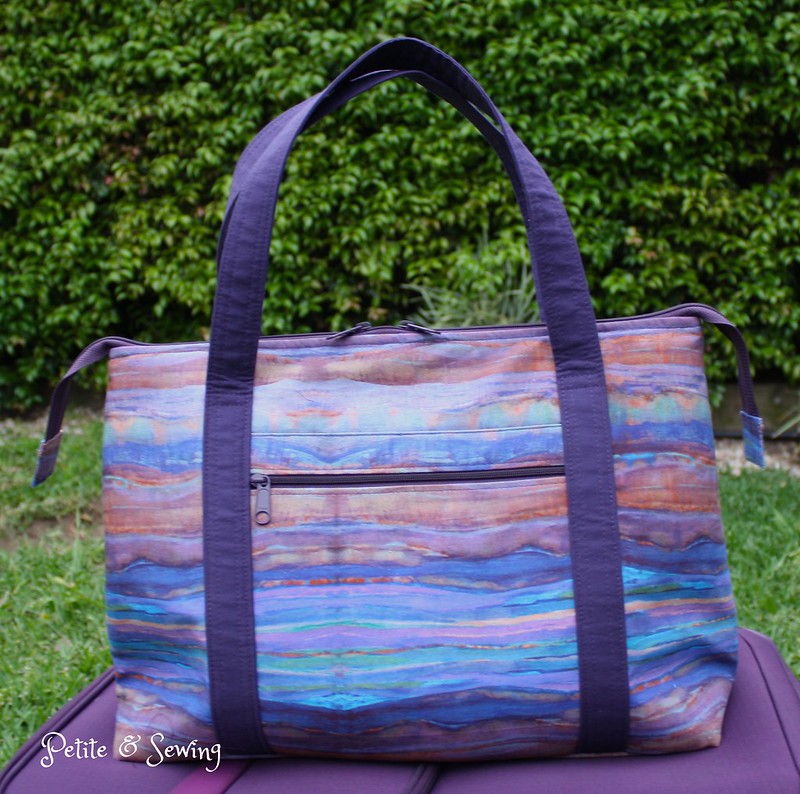 |
| Sharon's Take Off Tote |
I purchased:
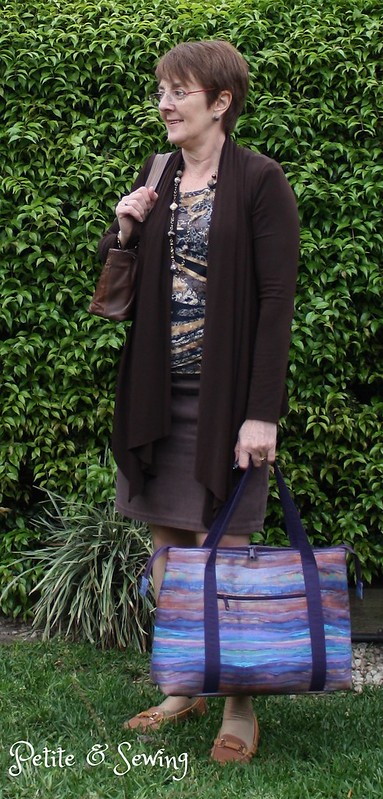
- Xanadu Purple Haze by E Mowder for P&B Textiles Quilting Cotton for the exterior from Spotlight.
- Blue and aubergine Quilting Cotton for the handles and lining from The Remnant Warehouse.
- SF0101 Legacy from Spotlight
- Bra Foam from Metro Fabrics which was a great tip from Alison as it makes the bag stand up.
When I started to think about the Take Off Tote I realised I wanted it to have a few modifications like the tote I have been using but found it was not that travel friendly as I couldn't put it over my luggage handle.
Again Alison showed me her copy of the The Better Bag Maker: An Illustrated Handbook Design Techniques, Tips and Tricks by Nicole Mallelieu and I then purchased the Kindle version for my iPad.
The pattern changes I wanted to make were:
* The top zipper now hangs over each end of the bag using the zipper instructions for the Avignon Traveller (location 2715). The zips are from ByAnnie, and are the Zippers by the Yard, which I purchased when I went to Puyallup in February 2016 and I was able to make the top zip double ended.
* Added a zippered pocket on the inside using the Basic Zippered Pocket instructions (location 579 in Pockets).
* Added purse feet to the base of the bag using the Structured External Base with Purse Feet instructions (location 1041 in Bases). For the base I used a thin chopping board.
The whole bag and lining are fused with the SF101 and I saved a lot of time doing this with my Elna Press
When it came to the inside slip pocket I decided to divide the open pocket into three for my sunglasses case, Boise earphones and mobile phone.
The back of the bag has a fabulous sleeve that slips over the handles of your suitcase. Alternatively you can make it into another pocket.
I also shortened the strap length by 5cm, as most bags tend to drag on the ground and this is a much better length for me.
I took it away for the weekend and was pleasantly surprised at what I could fit into this bag.
Now there is enough fabric for another bag, but it could be a while before you see that one.
Follow my blog with Bloglovin
Sunday, September 25, 2016
Pleather and knit top
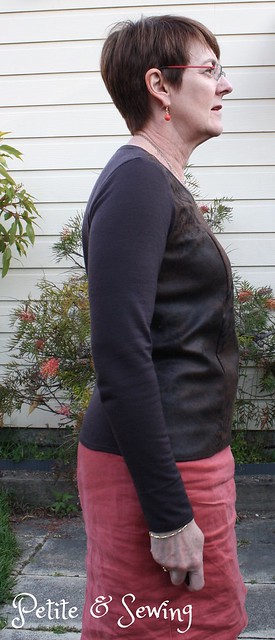 |
| We are going to have to do something about the lemon tree! |
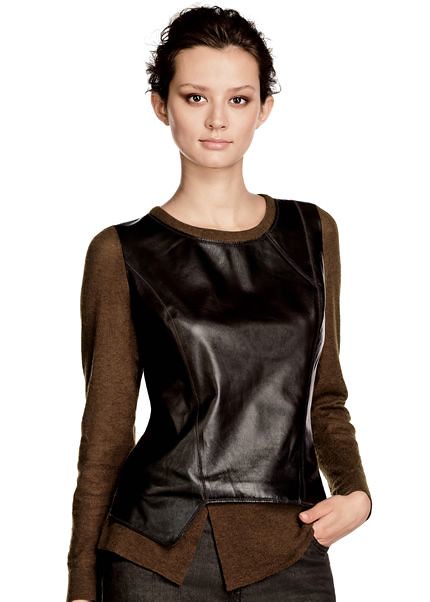
Kerryn's Fabric World sent me some swatches back in 2012 and they had this Polyester Spandex that has a leather look to it that just had to be added to my stash.
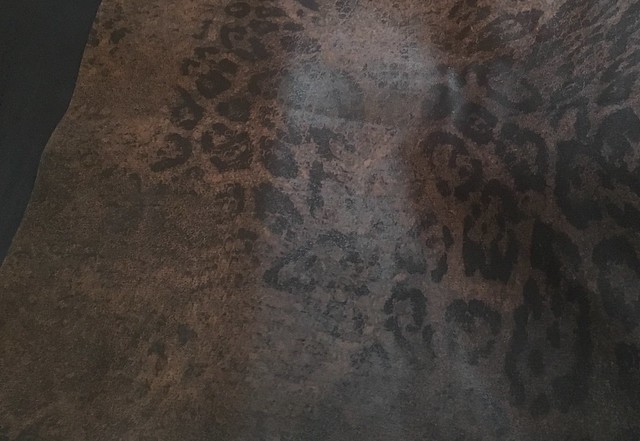 |
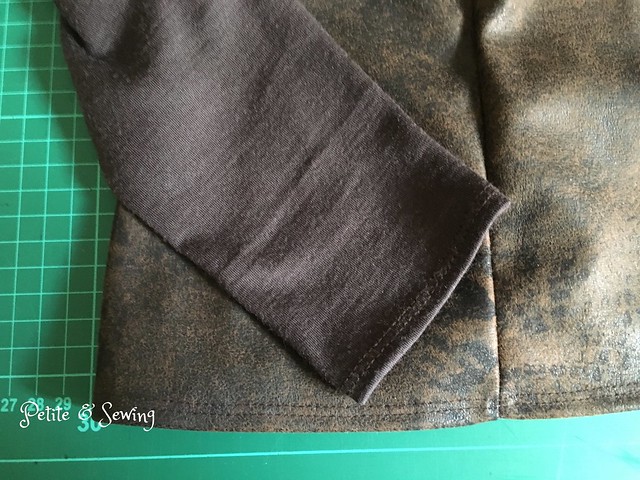
| It has a knit backing but has no stretch to it at all. |
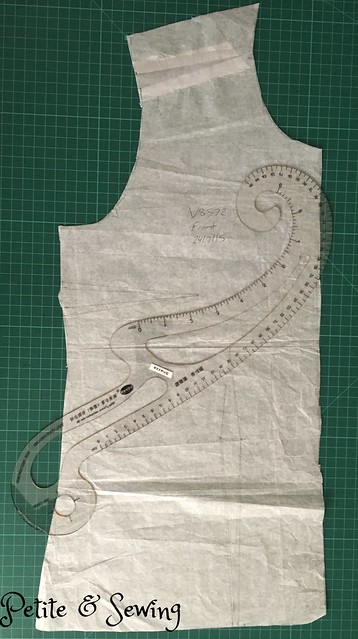
As the Pleather is essentially a woven fabric, I used Vogue 8572 my TNT woven blouse for the front, but wanted to add princess seams to it as well.
This was the 2nd item that I packed to work on during the Sewing Weekend in Brisbane and after I finished my cardigan I then started work on this top.
First up I traced off the front of V8572 and then proceeded to add armhole princes seams + 6mm seam allowance (so I wouldn't get confused between the two patterns).
 |
| Original front pattern |
 |
| Armhole Princess Seams added |
There was quite a bit of excess fabric above the apex curve and as I could see this myself I didn't take any measurements to put back on the pattern so I am not sure how much we ended taking out or how much we smoothed out the curve :(
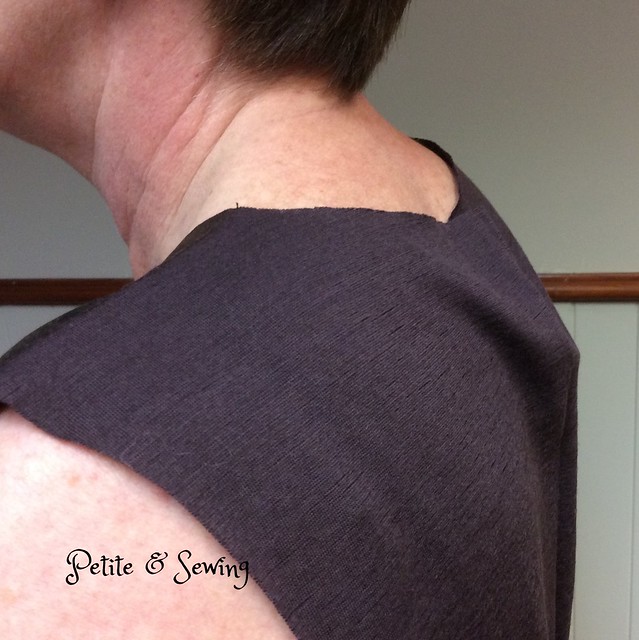
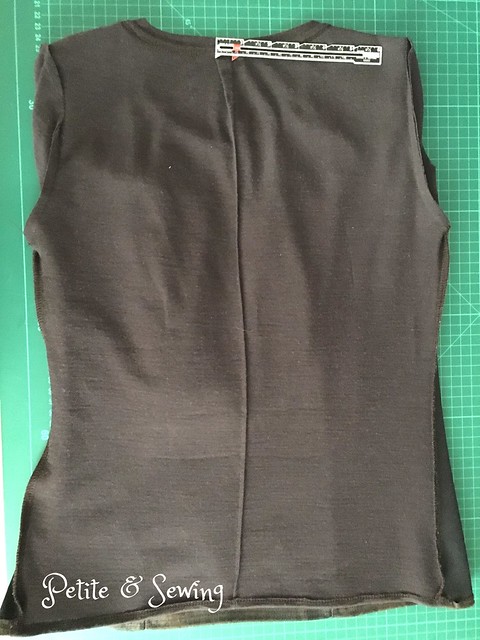
The back was a different matter,
So I took out a 1,5cm dart at the neckline down 8cm and then took a 2mm seam all the way down the centre back so from the right side it looks like I have a centre back seam
The rest of the top went together very well, I added a knit neckband to the neckline and then used my Coverstitch to finish of the neck edge.
As well as all the hems
Of course I have finished this right as the weather is starting to warm up but the top had its first outing to the ASG Industry Day at Simplicity Patterns yesterday which is in a big tin shed and this top kept me very comfortable.
******************
2016 Stash Out: 13.7 m
2016 Stash In: 18 m
Labels:
Coverstitch,
Kwik.Sew 3740,
Stash 2016,
Vogue 8572 (OOP)
Sunday, September 18, 2016
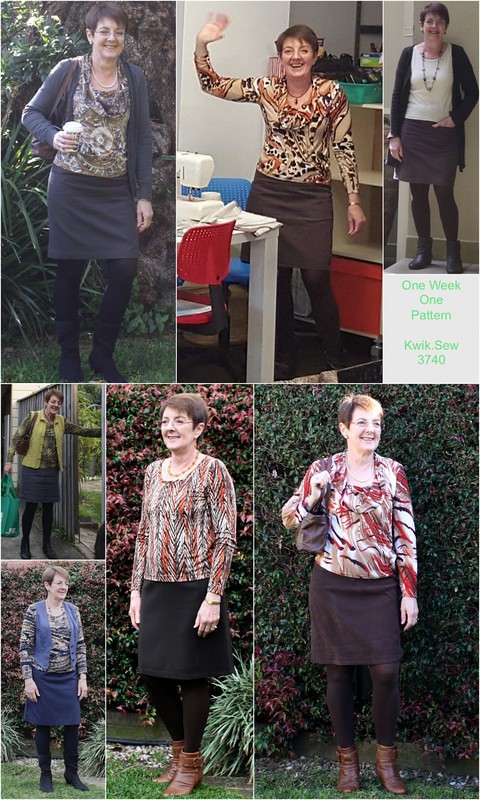
#OWOP - Kwik.Sew 3740
It is on again this year and is being hosted by Hannah from Cinderellis Sews from Saturday 10 September to Friday 16 September 2016,
and it shouldn't be a surprise to anyone who knows me that I have chosen Kwik.Sew 3740 as my pattern.
This is my go to TNT knit top, and I have made numerous versions, some of which have worn out completely.
Here is the week's worth, not necessarily in the right date order.
Coffee/grey/cream
This is as per the pattern, no changes made.
Orange Swirls
This is as per the pattern, no changes made.
Lemon T-Shirt and Cardigan
The lemon t-shirt has had the neckline raised by 2cm.
The cardigan is my t-shirt pattern with the front pattern not cut on the fold and the edges turned under 1cm.
Chartreuse, grey and ink navy
This top has had the neckline raised by 2cm.
Blue and Gold Swirls
This top has had the neckline raised by 3cm.
Orange arrow
This top has had the neckline raised by 4cm.
Red, Coffee, cream cowl top
This is as per the pattern, no changes made.
I have got a few more versions that I want to play with for summer so expect to see a lot more of this pattern.
Hannah also organised some fantastic prizes for this week and I found out on the 2nd day that I had won a Colette pattern, now to make a decision.
Saturday, September 10, 2016
#SewingDares - Cardigan
It must be the weather, but when I read Gillian's post on #SewingDares - Its' back! I thought why not and it might just be what I need to get my sewing mojo back.
I did wonder what Gillian would come up with for me and I must say I was very happy with the dare that Gillian has given me:
You mentioned needing more layering pieces in your wardrobe, so I dare you to sew a drapey cardigan and/or long-sleeved tee!
The best part of the dare is that there is no time frame but I did want some winter layers/tops so that did make me focus on it a lot quicker.
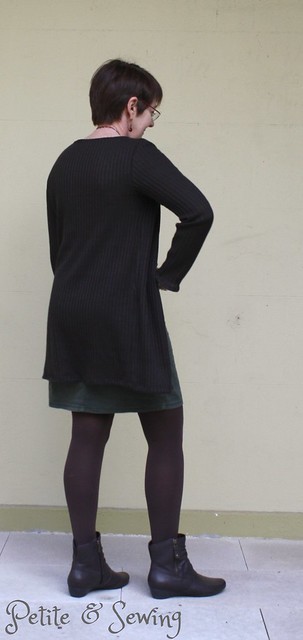
I do have a drapey cardigan that I sewed back in January and at this stage I don't need another one, but after seeing all the long cardigans about this year, I thought this would be an excellent alternative.
I purchased this fabric back in 2004 at Martin and Savage Textiles during an ASG Industry Day and it has been quietly maturing in my stash.
What I wanted was:
Pattern changes:
To finish the edges for the Coverstitch I added some interfacing:
******************
2016 Stash Out: 10.2 m
2016 Stash In: 18 m
I did wonder what Gillian would come up with for me and I must say I was very happy with the dare that Gillian has given me:
You mentioned needing more layering pieces in your wardrobe, so I dare you to sew a drapey cardigan and/or long-sleeved tee!
The best part of the dare is that there is no time frame but I did want some winter layers/tops so that did make me focus on it a lot quicker.
I do have a drapey cardigan that I sewed back in January and at this stage I don't need another one, but after seeing all the long cardigans about this year, I thought this would be an excellent alternative.
I purchased this fabric back in 2004 at Martin and Savage Textiles during an ASG Industry Day and it has been quietly maturing in my stash.
What I wanted was:
- Cardigan to be open e.g. no closures
- Length to fingertips
Pattern changes:
- added 18cm in length
- full bicep adjustment on sleeves of 1.5cm (eventually)
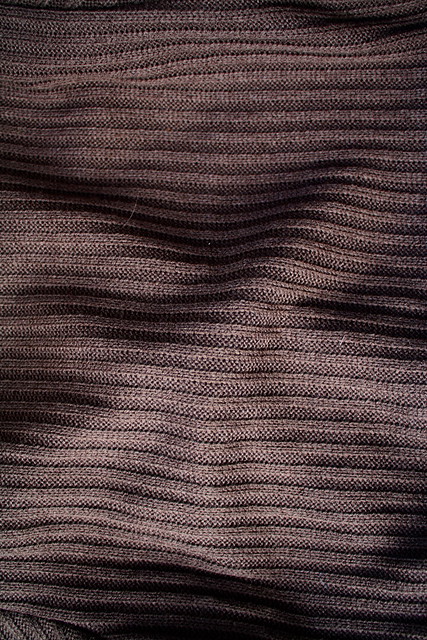
The rib in this fabric is quite distinctive so I cut it in single layers to make sure they were straight.
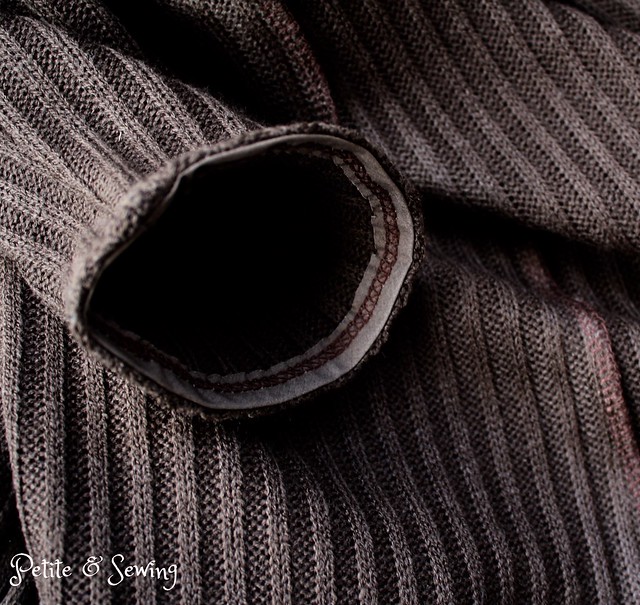
I did wonder how I was going to finish the edges as I didn't want a band as the fabric was too thick for that option.
I did wonder how I was going to finish the edges as I didn't want a band as the fabric was too thick for that option.
This fabric looks brown, but when I auditioned various bias tapes, it looked a lot happier with olive.
Now this cardigan was started back in May and was up to the binding, but the sleeves were too tight, as I hadn't done the Full Bicep Adjustment then :( and they were 4 thread overlocked in place, and it has been sitting in the too hard corner since then.
Thankfully I had enough fabric to re-cut the sleeves so that was a relief.
Then last weekend a group of us from Pattern Review got together in Brisbane for a weekend of sewing and this cardigan was one of the items I worked on.
Luckily for me, my sister has much better eyesight and very generously unpicked the 4 thread overlock so I could add my new sleeves.
Then I started to scratch my head about the bindings when Skye, who was sitting next to me, suggested I just turn the edges under and Coverstitch! Why do I over think things!
To finish the edges for the Coverstitch I added some interfacing:
- Neck edge - Formband colour charcoal
- Front edges - Edge Tape colour charcoal which I cut into 1cm strips.
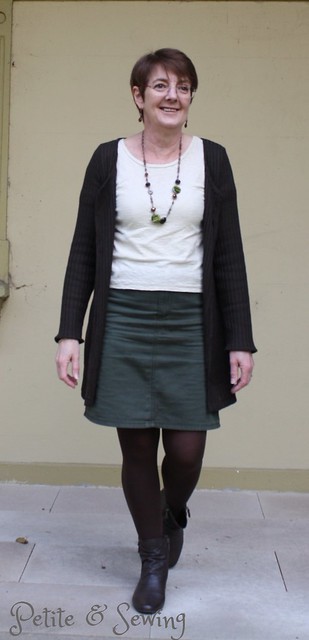
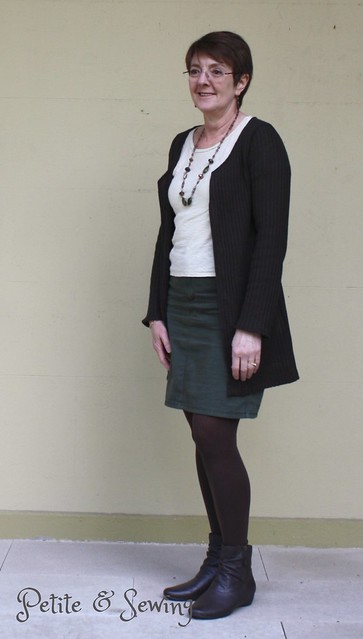
Here is how I wore it to work last Friday.
I think it will be a great layering piece until the weather warms up.
I think it will be a great layering piece until the weather warms up.
******************
2016 Stash Out: 10.2 m
2016 Stash In: 18 m
Sunday, July 3, 2016
Hitchhiker by Martina Behm
Remember the wool I purchased at Puyallup?
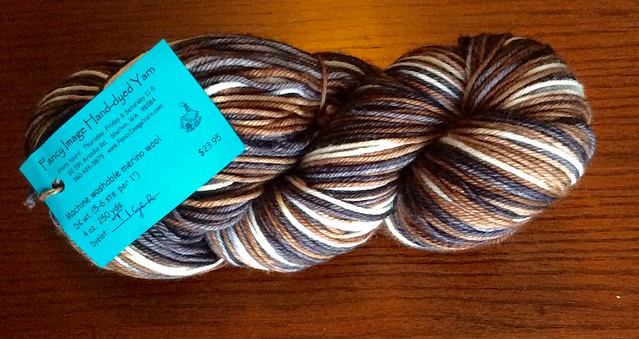
It was 2 skeins of Fancy Image Hand-dyed Yarn with the name of Tiger.
At the same time I also purchased the pattern Hitchhiker by Martina Behm that looks amazing in the variegated wool above.
I wanted to keep practising my Continental knitting so I thought this shawlette would be the perfect project to keep me busy whilst we were travelling.
I had only taken 2 pairs of interchangeable knitting needles with me and the smaller of these were 4.5mm and the pattern did call for 3mm. As I didn't want to purchase any more interchangeable knitting needles (as I had the full set at home), it did mean that I probably wouldn't get the 42 teeth although this is not critical to the finished shawlette.
So by the time we left Puyallup I had the first 8 rows knitted and was then happy to continue knitting on our road trip north to Canada.
This is a very clever pattern, you start with 2 stitches and there are only 8 rows to the pattern, so once you get into a rhythm, it is easy to pick up and put down.
I had knitted 14 points before we got on the plane to come home.
I continued to knit this on our flights home and quite a few hours snatched here and there when we got home to finish this shawlette.
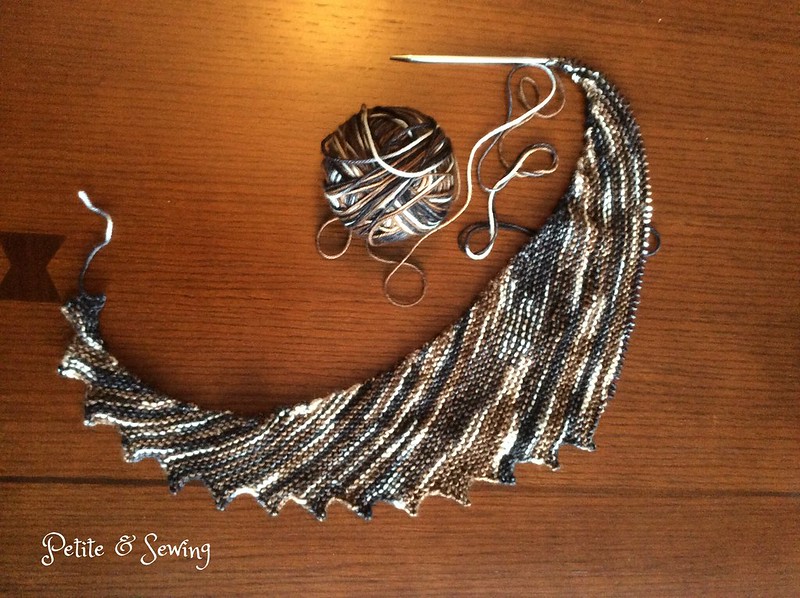
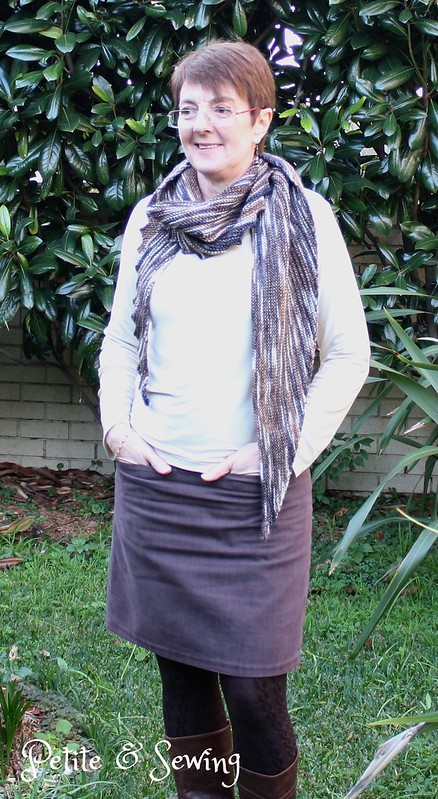
I am very happy that I did manage to get 38 teeth for my Hitchhiker shawlette
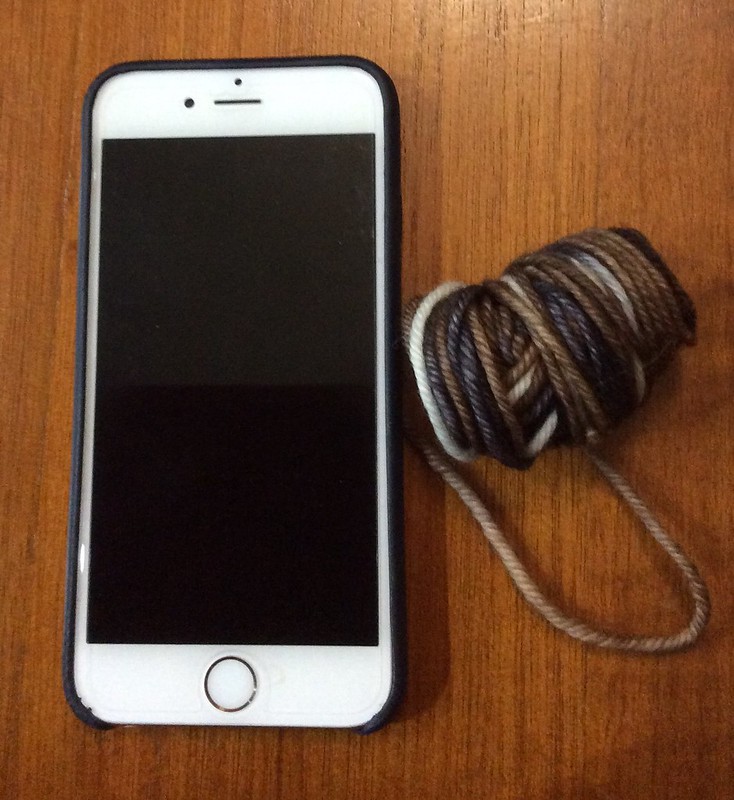
and have this tiny amount of wool left over!
I am still sewing and the jacket is coming along slowly!
It was 2 skeins of Fancy Image Hand-dyed Yarn with the name of Tiger.
At the same time I also purchased the pattern Hitchhiker by Martina Behm that looks amazing in the variegated wool above.
I wanted to keep practising my Continental knitting so I thought this shawlette would be the perfect project to keep me busy whilst we were travelling.
I had only taken 2 pairs of interchangeable knitting needles with me and the smaller of these were 4.5mm and the pattern did call for 3mm. As I didn't want to purchase any more interchangeable knitting needles (as I had the full set at home), it did mean that I probably wouldn't get the 42 teeth although this is not critical to the finished shawlette.
So by the time we left Puyallup I had the first 8 rows knitted and was then happy to continue knitting on our road trip north to Canada.
This is a very clever pattern, you start with 2 stitches and there are only 8 rows to the pattern, so once you get into a rhythm, it is easy to pick up and put down.
I had knitted 14 points before we got on the plane to come home.
I continued to knit this on our flights home and quite a few hours snatched here and there when we got home to finish this shawlette.
I am very happy that I did manage to get 38 teeth for my Hitchhiker shawlette
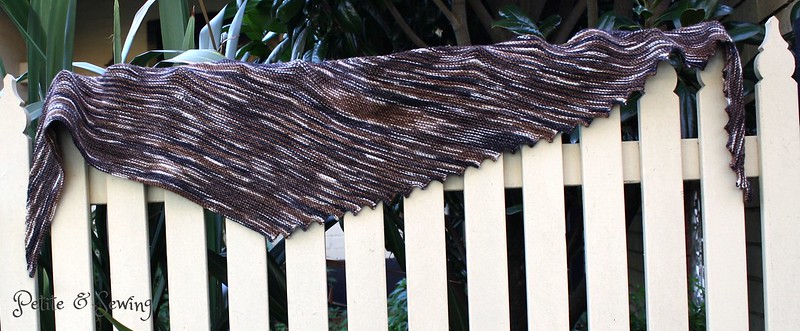 |
| This is the best colour of the shawlette |
and have this tiny amount of wool left over!
I am still sewing and the jacket is coming along slowly!
Sunday, June 19, 2016
Mint with choc chips Miette
I fell in love with Carolyn's Hunter Miette and had already downloaded the free downloadable pattern by Andi Satterland just waiting for its turn to be made.
It wasn't until January 2014 that I finally got around to purchasing the wonderful Morris Woollahra wool in Celadon 1116 from Morris & Sons in York Street, Sydney.
At the same time I found Gail's wonderful Miette Knitalong posts. This information is so detailed it let me knit my cardigan with a lot more confidence than if I had been doing it on my own, especially as I wanted to add length but working out the lace pattern by myself would have done my head in.
You can probably gather that I am not the fastest knitter, but the cardigan was up to taking the sleeves off (this is a top down cardigan) when we started our trip and by the time we got home I only had the button and neck band to do! I am so thankful that you can take your knitting on the plane now, it does help with the long flights.
I knitted a size 38 and:
The other issue that you can't see in this photo is the bust shaping for the size 38 gave me a very a large curve of fabric off to the side when I left the cardigan open, not a look that I wanted.
The one positive was that I love the buttons that I purchased from All Buttons Great and Small at Newton on the way home from work one Thursday night!
So I have been slowly re-knitting this cardigan starting with a size 36 this time and again added the 2 lace repeats in the length.
I thought I had finished it, and did wear it for Me Made May 2015 but again made the decision that long sleeves where necessary. This wool is too warm to wear in summer and the rest of the year I want my arms covered.
This is why I made my Me Made May 2016 Challenge about lengthening the sleeves so I could finally get to wear this cardigan in comfort in winter.
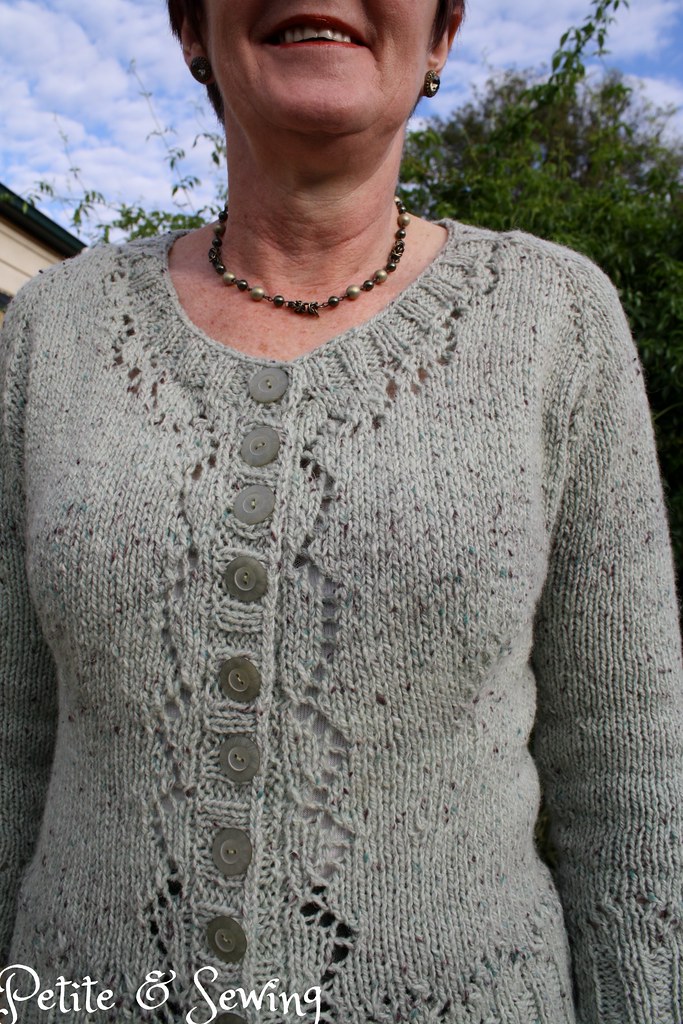
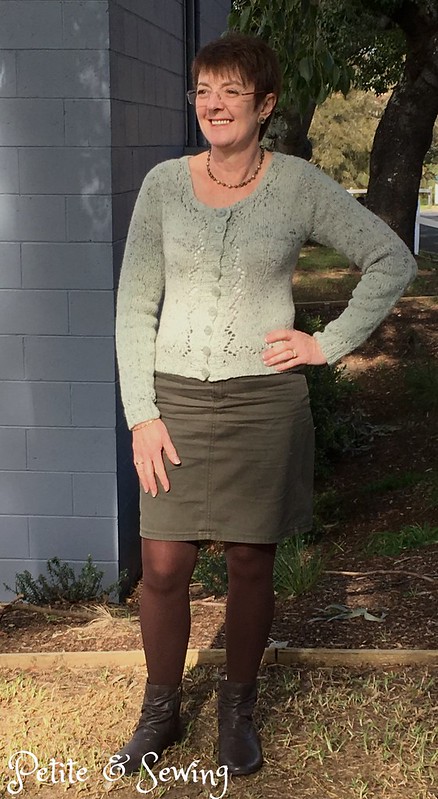
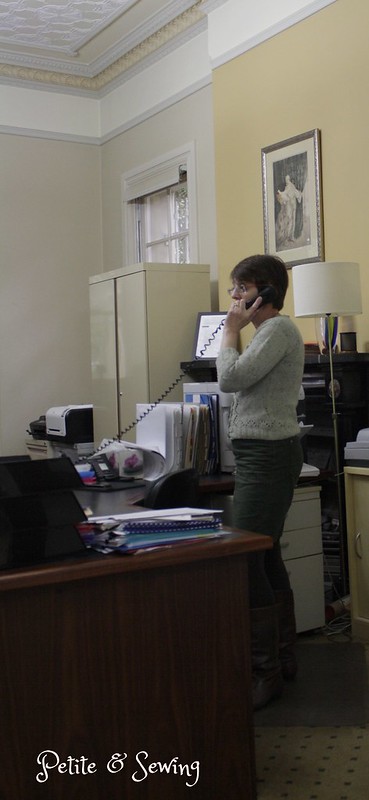
So here is my mint with choc chips Miette with long sleeves.
This is a snug fitting cardigan but that is the way is has been drafted.
- added an extra lace repeat in the length
- didn't change down to a smaller needle for the bottom band
- and also just knitted 2 pearl and 2 plain as I didn't want it to pull in too tight.
The other issue that you can't see in this photo is the bust shaping for the size 38 gave me a very a large curve of fabric off to the side when I left the cardigan open, not a look that I wanted.
The one positive was that I love the buttons that I purchased from All Buttons Great and Small at Newton on the way home from work one Thursday night!
I thought I had finished it, and did wear it for Me Made May 2015 but again made the decision that long sleeves where necessary. This wool is too warm to wear in summer and the rest of the year I want my arms covered.
 |
| 29 May 2015 |
So here is my mint with choc chips Miette with long sleeves.
 |
Sunday, June 12, 2016
A Special Birthday present!
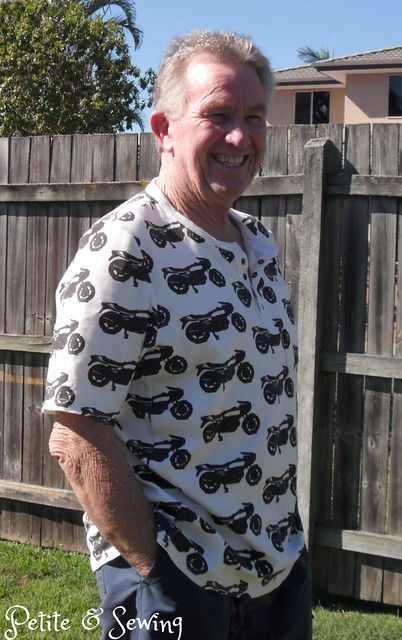
My DBIL is a keen Ducati lover and rider and he celebrated a big "0" birthday in April with friends and family.
I had been racking my brain what I could do for a present that was a bit different.
Then I started to see some patterned mens t-shirts about and was seeing a lot of fabric printed at Spoonflower and an idea started to formulate.
My BIL loves to wear t-shirts and also likes to have a pocket, which most RTW don't have, so after making 2 Strathcona Henleys for Mark, I decided this is what I would do.
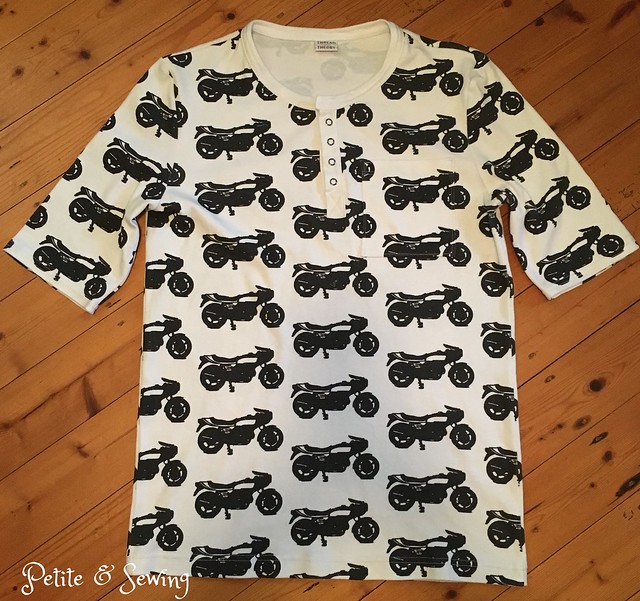
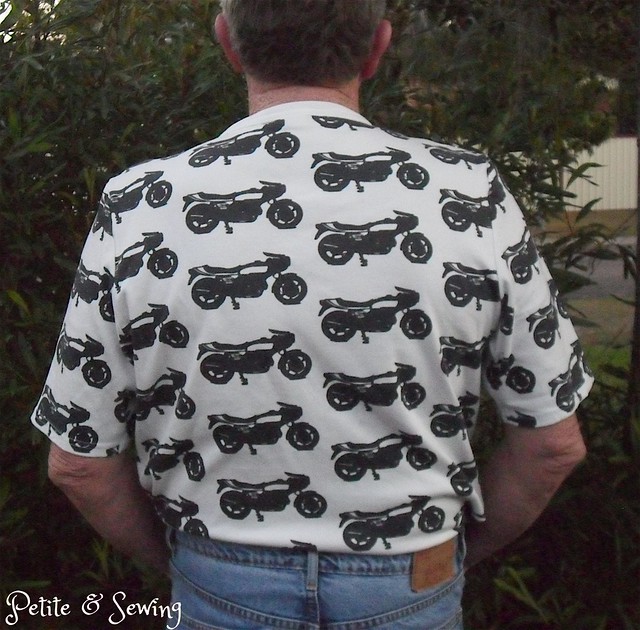
I found a picture of his 900 SS Darmah and then used the feature in PowerPoint to "remove the background" and with a bit of fiddling I had a pretty clear black and white jpg of this bike. I uploaded it to Spoonflower and chose a half-drop layout and then ordered a sample in their Organic Cotton Interlock Knit.
This arrived just before Christmas and gave me time to think about exactly what I was going to do. So at the end of February I ordered the Ducati fabric as well as a metre of the plain Organic Cotton Interlock knit in case I wanted to use it on the Henley.
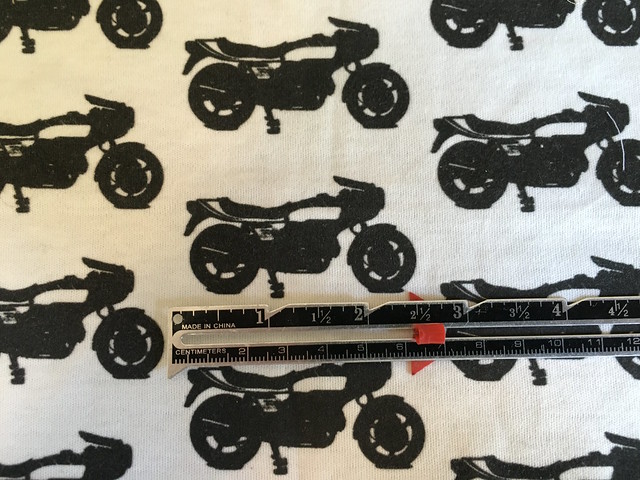
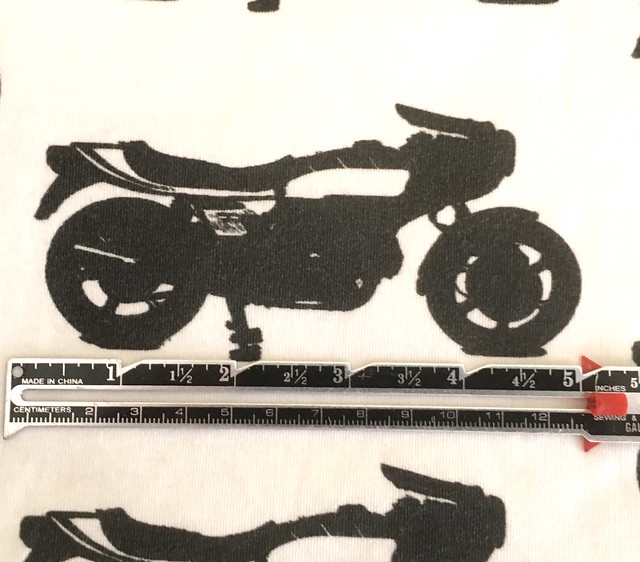
Now this is where I had a bit of a shock, the sample I received the bikes looked like this
and the real fabric they looked like this.
I did pop back onto Spoonflower to double check what size I had chosen, and it was the 5" size. I completely forgot to the check the size of the bikes on the sample because if I had I would have reduced the size of the bike to 2.5" only if I could have spaced them out a bit more.
Now I wasn't sure if this would look like a t-shirt or a night shirt but I decided to go keep going.
It did take a bit of head scratching to cut it out, Roscoe was locked outside and the fabric was spread out on the floor so I could get a better idea of the positions. I soon realised that I would not be able to pattern match the sides so I decided to have a
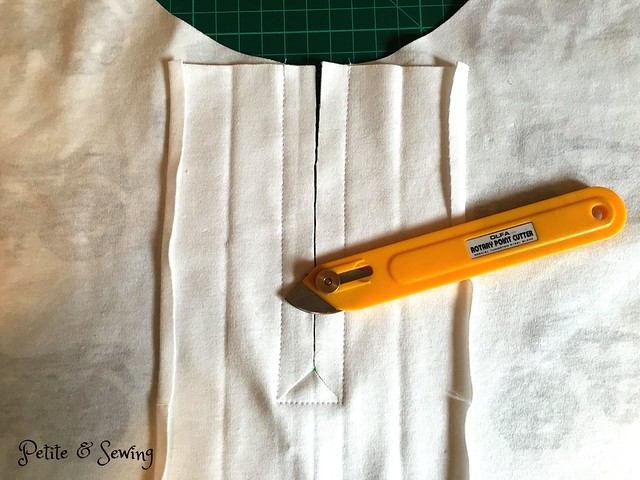
The first thing you do is the placket, so I chose to use the white organic cotton interlock knit for this and it went together very well with the help of the Olfa Rotary Point Cutter.
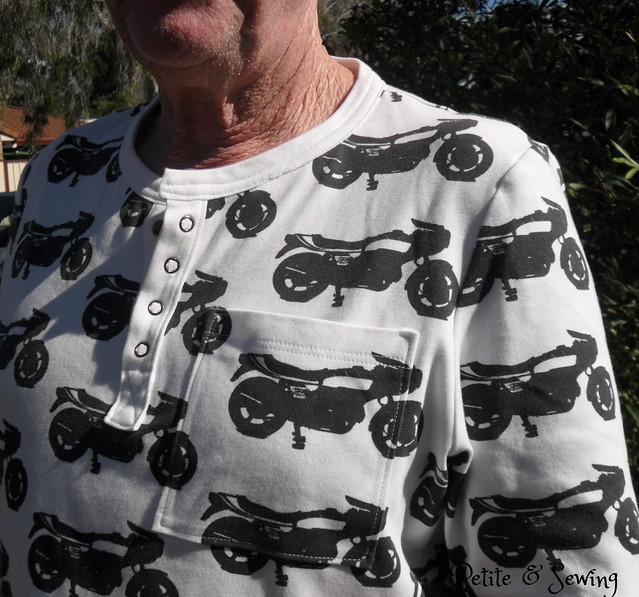
Next up was the pocket. Now I wanted this to be invisible so I traced of a pocket pattern
and then laid it on the fabric to get the design and placement correct.
I've never installed a knit patch pocket before and found this great tutorial over at Seamwork.
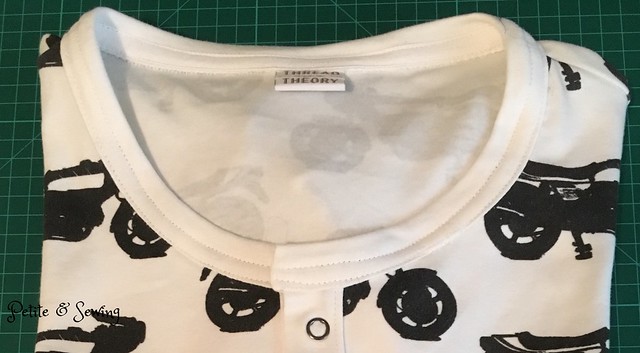
Next the shoulders and then the neckband. I have tried the method that Thread Theory suggests but I just don't like the overlocking on the neckband and this is the way I did the neck band on Mark's but didn't document it.
I sew the ends of the neckband together as per the instructions, but that is where it stops.
Then I pin the neckband to the neckline like this, and sew it in place.
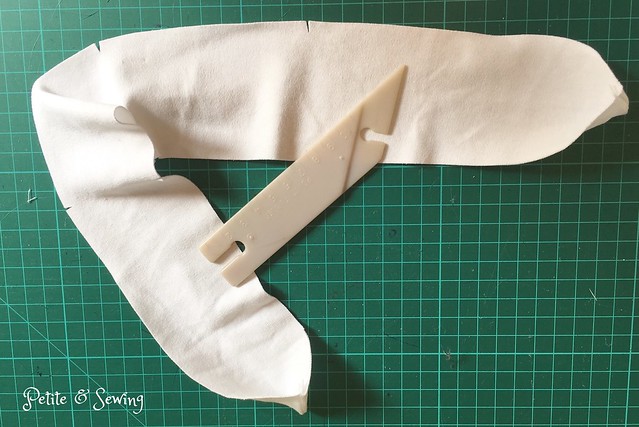
Then I turn under the other neckband edge and pin in place and handstitch this in place, remembering to add the label. Thinking about this it is like attaching a waistband.
The final step is to add some twill tape to the inside neckband just like RTW and I did this for Mark's Skiing Henley but found more information over at Baste + Gather and her T-shirt Neckline Twill Tape Tutorial.
The rest of the t-shirt went together very smoothly.
My final decision was what I was going to use on the placket:
He is very happy with his Ducati Henley.
*****************
2016 Stash Out: 8.1 m
2016 Stash In: 18 m
I had been racking my brain what I could do for a present that was a bit different.
Then I started to see some patterned mens t-shirts about and was seeing a lot of fabric printed at Spoonflower and an idea started to formulate.
My BIL loves to wear t-shirts and also likes to have a pocket, which most RTW don't have, so after making 2 Strathcona Henleys for Mark, I decided this is what I would do.
This arrived just before Christmas and gave me time to think about exactly what I was going to do. So at the end of February I ordered the Ducati fabric as well as a metre of the plain Organic Cotton Interlock knit in case I wanted to use it on the Henley.
Now this is where I had a bit of a shock, the sample I received the bikes looked like this
and the real fabric they looked like this.
I did pop back onto Spoonflower to double check what size I had chosen, and it was the 5" size. I completely forgot to the check the size of the bikes on the sample because if I had I would have reduced the size of the bike to 2.5" only if I could have spaced them out a bit more.
Now I wasn't sure if this would look like a t-shirt or a night shirt but I decided to go keep going.
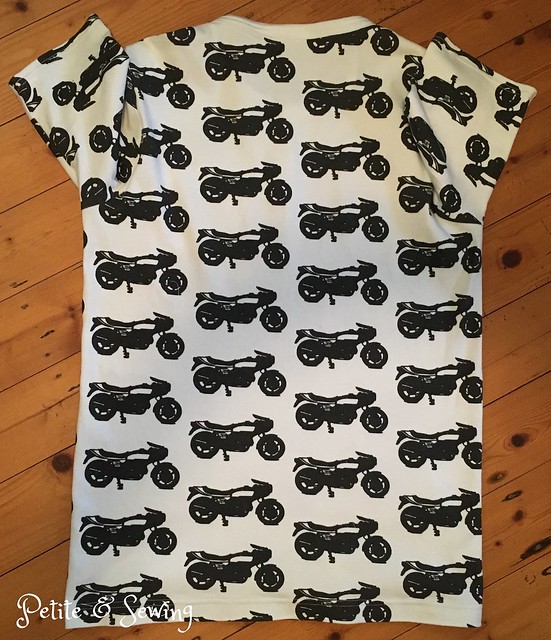
It did take a bit of head scratching to cut it out, Roscoe was locked outside and the fabric was spread out on the floor so I could get a better idea of the positions. I soon realised that I would not be able to pattern match the sides so I decided to have a
- full bike at centre front
- a full bike at the side seams on the back.
The first thing you do is the placket, so I chose to use the white organic cotton interlock knit for this and it went together very well with the help of the Olfa Rotary Point Cutter.
Next up was the pocket. Now I wanted this to be invisible so I traced of a pocket pattern
and then laid it on the fabric to get the design and placement correct.
I've never installed a knit patch pocket before and found this great tutorial over at Seamwork.
Next the shoulders and then the neckband. I have tried the method that Thread Theory suggests but I just don't like the overlocking on the neckband and this is the way I did the neck band on Mark's but didn't document it.
I sew the ends of the neckband together as per the instructions, but that is where it stops.
Then I pin the neckband to the neckline like this, and sew it in place.
Then I turn under the other neckband edge and pin in place and handstitch this in place, remembering to add the label. Thinking about this it is like attaching a waistband.
 |
| oops I forgot the label! |
The rest of the t-shirt went together very smoothly.
My final decision was what I was going to use on the placket:
- black buttons
- white buttons
- smoke open prong ring snaps
The snaps won and I got to use my new toy, the DK-93 snap press which you saw happening here!
The problem with a surprise gift and your sister telling you not to make the t-shirt because you are so busy, is the Henley was a bit too tight for my BIL's liking, it did fit him and in fact it is the best fit across his shoulders he has ever had but it was just a bit too close fitting for him to be comfortable in.
So it came back home with me so I could adjust the fit.
Luckily I had some left over fabric and manage to cut out two side panels of 8cm width that ended up in a point into the sleeve hem.
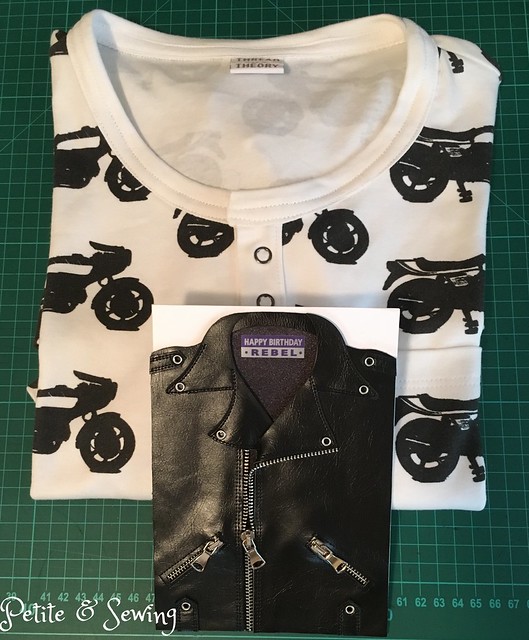
And look at this cool card I found when we were in Canada!
When he opened his parcel he thought I hadn't done anything to his Henley until my sister showed him the pattern matching at the front side seams.
He is very happy with his Ducati Henley.
*****************
2016 Stash Out: 8.1 m
2016 Stash In: 18 m
Labels:
Fabric,
Gift,
Spoonflower,
Stash 2016,
Strathcona Henley,
Thread Theory
Subscribe to:
Comments (Atom)
