
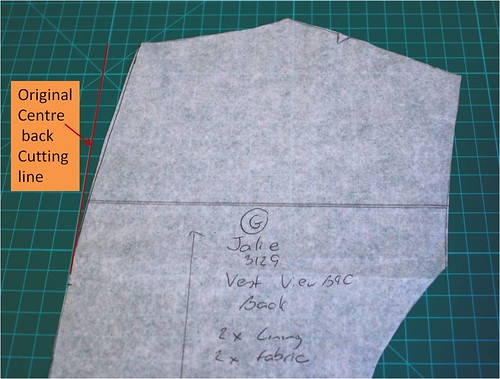
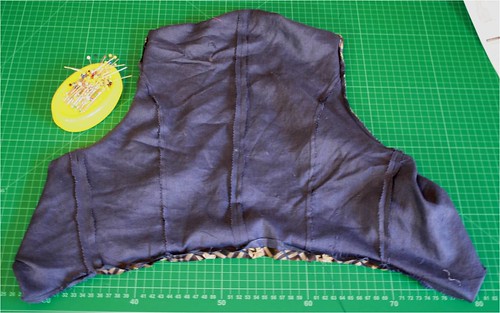
I only did the one adjustment for this pattern, and it was to shape the centre back seam to accommodate my round shoulders. This is not the way that I do my round shoulder adjustment for garments with sleeves, but this worked for this vest.
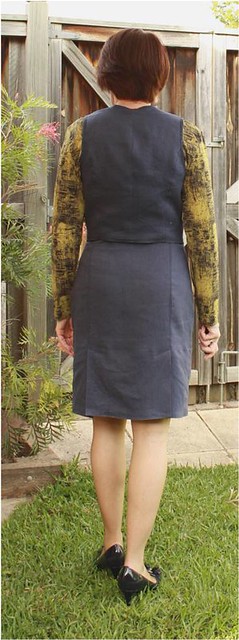
However after looking at the pictures above and wearing it today, the back neckline might be a bit high. I will get my sewing buddies to have a look at it when I see them next.
I cut this vest out of the left overs from this skirt and blouse and this dress.
There are a few things that I did with this pattern, that aren't in the instructions, but then they aren't in a lot of instructions either.
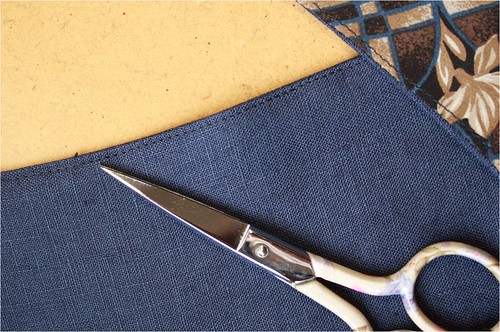
- Pressed all the seams open, using a June Taylor Board which lets me get into all the tight spaces and then pinked all the seams.
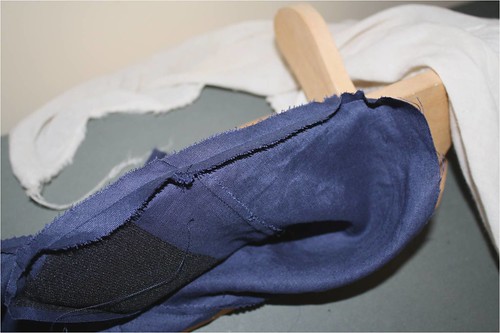
- Understitched all the seam edges, even understitching the hem seam by hand as I couldn't get my sewing machine into the small opening in the lining.
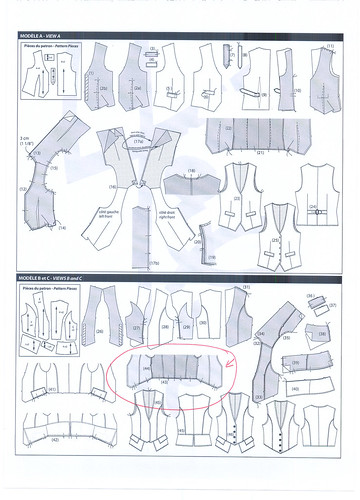
There is also a mistake in the diagram for (step 43) which says, "pin bottom edge of vest and stitch". Then the diagram for View C looks like this:
You then pull it out through the gap in the lining (step 44) and finish off with some handstitching, topstitching, buttonholes and buttons.
Here you can see the lining, it is only on the centre back panel.

This is item 10 for my SWAP, and it is a woman's prerogative to change her mind, so the 2nd pair of shorts are out and the vest is in.
So I only have to finish the Minoru and a knit top before end of April,


11 comments:
What a great new wardrobe you've built! Congratulations!
I would be woo hooing with your new wardrobe too. Nice work Sharon.
This looks fabulous Sharon! What a great idea to make it in matching fabric to your shirt and dress.
Hi Sharon! Great job of fitting this vest. I often make the same adjustment you did for a rounded upper back. Nice topstitching and lining, too. Congrats on making it so far through the SWAP challenge. I know you'll finish it, for sure!
Such a great "tie it all together" piece! Appreciate the construction tips!
Beautifully made vest! I have had a vest pattern in my queue for so long now I'm embarrassed. I actually have two; a Burda and Hot Patterns. I'm looking forward to your finished SWAP.
Great vest pattern! It looks really good on you. Thanks for the tips on sewing it!
This is going to be an awesome and stylish SWAP wardrobe and being rather pleased with it, even if only directed to the vest, is an understatement. Totally fabulous. And I just watched the video for the tailor board - how do people think of these things. That must be an indispensable tool to have.
What a fabulous vest. I am really looking forward to seeing the SWAP all together. I love the finish quality you get on all your items. Very inspirational.
This is a great looking vest.I use to love vests until I became busty in my old age but this one looks really nice on you.
This is a great looking vest.I use to love vests until I became busty in my old age but this one looks really nice on you.
Post a Comment