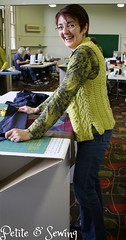
I finished this blouse at the end of June and it has taken me this long to get photos.
This is my very first Marfy pattern, so I was interested to see what adjustments I would need for their patterns as I love the designs they come up with.
As I said in my earlier post, when I had the fitting session with Alison I had my normal adjustments done, which are:
Back
- Round shoulder – 1.5cm added
- High round back - 1cm added
- Round shoulder - 1.5cm removed
- 1.5cm gaposis taken from the front neck edge
Alison then measured my bicep (27cm), and with the tape measure still around my bicep she measured from the top of the tape measure to my shoulder point which is the cap height (11cm).
Here is the Marfy pattern with the pattern tissue measurements, which showed the cap height on the pattern was 15.5cm, so Alison got me to add 1cm to the sleeve and blouse armholes before she looked at any other adjustments.
Alison then got me to do the following adjustments:
Back
• Take out the High round back and replace it with a 8mm gaposis from the back neck edge
• Added 1.5 cm at the centre back neckline, take back to nothing at the shoulder seam
• Added 1cm to armhole
• Added 2.5cm at side seam tapering back to the normal seam towards the armhole
Front
• Added 1cm to armhole
• Added 2.5cm at side seam tapering up to zero towards the armhole
• Shortened the dart by 7.5cm
Sleeve
• Added 1cm to the side seams to match the armholes on the bodice
• Bicep adjustment of 2cm
Here is the completed blouse at the end of a days work:
Front
Back
Notes for next time:
- I have managed to put one of the sleeves in wrong, it needs to be rotated back by 2cm.
- The cuff is too tight where the sleeve joins it, so I will straighten the sleeve side seams a bit each side and add the extra to the cuff as well.
- You can see a slight ridge near the neckline of my blouse, this has been caused by the 1.5cm that was added to the back neck edge. This will be removed for future blouses.
- I will probably make the back darts a bit deeper and add a small bust dart at the front.


12 comments:
Ooh very nice! Thanks for sharing all the alterations with us also.
Your blouse looks great! With the few tweaks you mentioned, it will be perfect!
Good work on the blouse. The fit details are very useful.
Very nice pattern Sharon. Can you show me exactly what you mean by rotating the sleeve head at the next guild meeting? I have so much trouble setting sleeves.
You must be very happy with that blouse! The fit is lovely.
Sharon, I love this blouse. Perfect color for you. I would never have noticed that there was anything amiss with the sleeve. Lovely.
Your blouse is lovely. Thanks so much for explaining the alterations, with photos too!!
Congratulations on learning to alter your patterns. It's not always easy to make those adjustments, but you have done a really good job!
Thanks for showing your alterations. Your blouse looks beautiful.
Your blouse is really nice, Sharon! I enjoyed reading about the adjustments you made to the pattern. I would venture to guess that, even with the changes you want to make next time, the blouse fits you as well as most RTW blouses do. Great job, and thanks for the extra details!
What a great job. Your blouse looks nicely fitting already.
I would like to see how you rotate the sleeve as well. I guess coming to the guild meeting would be a bit tricky, but I would love a photo! Did Alison explain why the sleeve needed rotating?
Great blouse, it fits very nicely - a great staple for many seasons!
Post a Comment