Friday, January 22, 2010

LBD Update

Is nearly there -


and I need to get off the computer and get this done as I want to wear it to a function on the 30th.

*****************

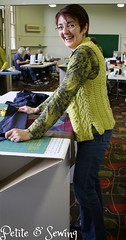
It was warm enough today to get a photo of me wearing my new coral top - BWOF-05-2008-103 which you saw on Isabel for the Six Piece Sew-Along.

It will also go with both the A-line and straight skirts I showed you yesterday.

Thursday, January 21, 2010

I've been dreaming ....

of this outfit since before Christmas and managed to cut it out on 2 January 2010.

It started with some very soft dark bown linen that I purchased from The Fabric store last year, and this Japanese Cotton that my DS gave me over 12 months ago.


I have used McCalls 2029 (OOP) which is my TNT A-line skirt that I love. I have changed the lengthwise grain for the front and back pieces so the fullness of my skirt hangs evenly around the skirt. Okay it does mean that I have centre front and back seams on my A-line skirt but I prefer not to have all the fullness at the sides.

The skirt is fully lined in Sun Silky, and I used my rolled hem foot on my sewing machine to hem it and the invisible zip from the tutorial is in this skirt.

For the hem I overlocked the edge, turned it up that amount and stitched it from the right side.


This top was supposed to be part of my 2009 SWAP however life got in the way. It is based on Vogue 1822 (OOP) that has been adjusted to within an inch of its life, and has given me a number of great tops.

I scooped the neckline this time and made it sleeveless. This is also fully lined with Sun Silky and also has an invisible zip which took me 3 goes to get the positition right, but with the basting stitches it was soooooooo easy to take them out and do it again until I was happy with the position.


This top will also go with this brown linen skirt that arrived in the same package as the Japanese Cotton from DS.


It was also part of the 2009 SWAP and has been hanging in the cupboard waiting for me to hem it for such a long time.

Monday, January 11, 2010

Invisible Zip Tutorial

At our sewing weekend, Gayle asked if anyone knew an easy way to put in an invisible zip.

This is the method that my DS showed me many years ago which I have used ever since with 100% satisfaction and you will see that you have the chance to fix any issues before those small stitches are sewn.

First up I machine baste the seam allowance on both pieces of the garment. I am working on a skirt for this tutorial.


Then I place a pin 2cm down from both top edges of the garment pieces on the basted line. The reason I use 2cm is 1.5cm for the seam allowance and then I leave a .5cm for a hook and eye. You can place the pin at 1.5cm so it sits flush with your facing.


Tuck under the seam allowance (basted line) and line up the zipper teeth with the baseted line and the zipper stop with the pin. This step lets you check if you are sewing it to the correct surface.


Then fold the seam allowance back out and then pin the zip in place on both sides.


I then baste the zip in place using the normal zipper foot, sewing from the top down on both sides, it doesn’t have to be right up against the zipper teeth, this is your safety net to make sure that the zip is where you want it to be.


Now do up your zipper and check that is where you want it to be.

If the zip isn't where you want it to be then you can easily pull out the last lot of basting stitches and redo them until the zip is in the correct position.

If it is all aligned, then using the “invisible zipper foot” open the zipper and place the zipper teeth into the grove on the foot ensuring that the needle is on the correct side of the zipper teeth. I move my needle position 2 postions from the centre either way (depending on which side I am sewing) and use my finger to roll the coils away from the needle as I sew. Sew from top to bottom on both sides with your regular stitch length.


Here is the zipper sewn in.


The seam below the zip can be sewn first or last, and this tutorial works perfectly for both.

Completed back seam

Okay you now have to take out two rows of basting stitches, but they are a lot easier to remove then those smaller stitches.

The next step is the facing finish and if you have Australian Stitches Vol 10, Issue 10, Martyn Smith demonstrates this step-by-step on page 20. There are also a number of tutorials available on the Internet.

Sunday, January 10, 2010

Six-Piece Sew Along

Stitcher's Guild is holding a Six Piece Winter Sew Along (December to March) although with the differences in the hemispheres, some of us from "Down Under" are doing a Summer collection e.g.

SUMMER
Dress
Skirt (accent colour)
3 blouses/tops (1 to match skirt, 2 to complement)
1 light layering top/cardigan

I am in desperate need of summer clothes, so I am making:

Dress
Brown patterned dress BWOF 05-2008-104 - completed

Skirt
An A-line skirt using McCall's 2029 OOP in this Brown/pink/orange/coffee linen


Blouses/tops
1. Matching top in the above linen- pattern to be decided
2. Cream bamboo knit - pattern to be decided
3. Coral knit that DS gave me in BWOF-05-2008-103 - completed. I have made this top before here.

Here is the top on Isabel where I have draped the linen to see if they work together.


Light layering top/cardigan
This I am still trying to figure out.

**********************

I had a few questions on "A New Me"

Jenni asked Has she a name yet?

Yes, her name is Isabel, after my DM who was the one who taught me to sew and sewed for me for many years when I was younger.

Kbenco It sounds so much easier than a duct tape dummy, with the tape holding rigid by itself (is this correct?)Is there another name for framer's tape? I am not familiar with this product? Is it tape used for picture frames - and where do you buy it?

Yes the tape is used by framers for the back of the picture frames. It has to be dampened to stick. DS purchased it from a craft store, it comes in a large roll. The tape isn't rigid until it dries, then it can stand by itself.

Sunday, January 3, 2010

2009 - Sewing Wrap-up

Hoping you all had a fantastic New Year and wishing you plenty of sewing in 2010!!

Well where did 2009 go?

I've been reading a lot of sewing blogs lately and seeing what everyone has achieved in the past year.

I really had no idea of what I had completed and this is where having my blog does come in handy as I know that I have shared with you each of my accomplishments. So what was the total - 9 garments, namely:

2 x Dresses
3 x Pants
4 x Tops

Unfortunately there is a dress and a skirt that should be included in this count except they haven't been hemmed. For some reason this part of the sewing process seems to be a stumbling block for me.

Favourite Garment

This is the one that I wore the most and it would be The Stripey Top that I wore to work with trousers and skirts and then on the weekend with my jeans, it is such a versatile top. Thank you again DS for sending me the fabric.

Highlights
  • Sewing with sewing buddies.
  • Going fabric shopping with my sewing buddies.
  • Having a great overseas holiday with DH and buying fabric LOL.
2010 Sewing Goals
  • Complete 1 garment a month,
  • Complete at least one competition either at Stitchers Guild or Pattern Review.
2010 has started off nicely as I have just finished a top, will share soon.