Thursday, June 3, 2010

Fitting Weekend

I'm back home after a fantastic 3 day weekend having patterns fitted by Alison, "The Sewing Lady" in Brisbane.

This was my birthday present from DS, a full day of fitting on the Saturday with Alison and then a general sewing/fine tune fitting on Monday morning.

This is how it worked, there were 3 attendees for the fitting day which included both DS and I (this was all day Saturday, a maximum of 4 attendees for these days and they get booked out well in advance) and I managed to get 3 patterns fitted:

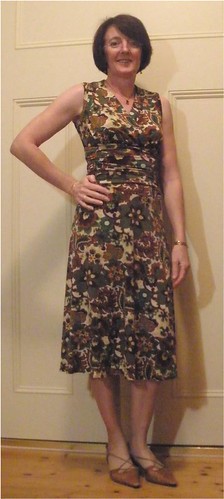
Simplicity dress 2648, View A with sleeves.


Marfy blouse 2254 and Marfy skirt 2253 (the free patterns included in the Marfy 2010/11 Annual).


Sunday was sewing at DS’s home in the morning and then we met Alison at Sckafs, Indooroopilly to learn about what to look for when choosing fabrics, trims, interfacings, etc which gave me quite a few light bulb moments.

Monday was back at Alison’s for the morning session of general sewing with 4 attendees (maximum of 8) so we tweaked the dress, sorted out the blouse and the skirt is underway. I’ve still got a long way to go on the dress and skirt, but the blouse is closer to finishing so you will probably see it soon.

The reason so much was achieved was I had all the patterns with my normal adjustments done, taped and pinned together when we arrived on Saturday. Luckily only 2 people (me being one) were having patterns fitted that day which was fantastic. Alison fitted the paper patterns on me and I made the additional changes to the paper patterns, then DS (my birthday slave) cut out my fabric, pinned up the fabric toile for the next fit and then she got into the actual sewing of the garments, this was at the classes and at her home. I also managed to contribute to the sewing on Saturday night and Sunday morning.

This was a fantastic birthday present and one I will remember each time I wear one of the above garments.

I will share more information on each of the patterns as they are completed so until next time ...

Tuesday, May 25, 2010

Not much sewing going on.....

May is turning into a month of hemming projects and preparation, but no actual garment sewing.

As you saw in my last post I have been busy shortening hems on my t-shirts, and have finished another 5 since (1 of mine, 2 for my DM, 1 for my DS and 1 for a friend of DM's) and then DH hands over two pairs of work pants that need hemming as well (1 pair is still hiding in the sewing room LOL).

Then last Saturday at our monthly ASG meeting at Rhodes, Angie Zimmerman* talked to us about Chanel Jackets and then proceeded to help us adjust our patterns.

This was the prompting I needed to start the Chanel jacket that I talked about here.

I wore the Chanel jacket that I made about 3 years ago so Angie could see where it was overlapping at the top of the centre front, and the adjustment was a 0.5mm tuck in the neckline tapering to zero at the bust point.


The remainder of the day was spent cutting out the tweed and interfacing. Yes I am going to interface the whole jacket with Sheerweft just to give it a little more body and keep the tweed together. This is as far as I got on this project.

This week I am preparing 4 patterns to take to Brisbane with me on Friday for a long weekend to attend a Fitting Workshop with Alison Wheeler** and maybe by Monday I will have some garments to show you, so keep your fingers crossed.

*Angie Zimmerman writes a lot of articles for Sewing with Stitches Australia (formerly Australian Stitches) and also has her own sewing workshops.

**Alison Wheeler operates her own sewing school, "The Sewing Lady", in Brisbane. She is an experienced dressmaker and teacher offering a wealth of knowledge and information to her students across a wide range of sewing techniques.

Thursday, May 13, 2010

How to spend a Saturday

One of the reasons I purchased the Janome CP 1000 was to help me get a more professional hem on my purchased t-shirts when I shortened them as they are always too long.

As the Sydney weather has suddenly taken a quick trip south in temperature, I need tops desparately so the other Saturday instead of going to one of the two ASG Groups I go to I bit the bullet and got stuck into this job.

It took me most of the day because I probably do it a lot more labour intensive than it needs to be, however this system worked for me.

  • First of all I tried on all the tops and pinned the hem where I wanted it to be.
  • Measured the turned up amount, deducted 2cm from this and cut the remaining hem off.
  • Pressed up the 2cm hem.
  • Glued the hem in place.
  • Wound the 3 bobbins to use in the Bob N' Serge and threaded the machine.
  • Stitched the hems.
  • Finished.

  • I now have 7 t-shirts that are the correct length.


    The amount I shortened these t-shirts varied by brand ranging from 5cm to 8cm and that is not including the hem amount.

    I have also made a note in my notebook of how much to wind on the bobbins for each hem as I'm sure this will be a job I have to do again.

    Saturday, May 1, 2010

    Cardi for me

    After making Mum's cardi and top, I decided I had better get my act together and make mine.

    I had some brown Mercury Jersey from Lincraft that was waiting for its turn, so the other week, after reading a couple of reviews on PR (got to love that place if you want to save yourself some frustration) I started on this project.

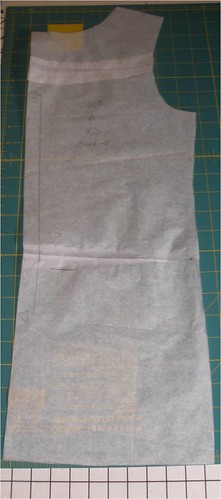
    I didn't do any adjustments to the Cardi pattern and only did some of my normal adjustments to the top e.g.:

    High Round back and Sway Back.


    Then I did the front neck gaposis and also continued this through the front neck facing.


    • I read yorkshire lass's review and she did her “layout of the fronts single layer as directed but chalked the position of the first one onto the fabric then fit the other one around the chalked line. This way I got the two fronts way closer together than the layout suggests is possible”. This worked well for me as well and it made it a lot easier to cut out the front pieces as well.
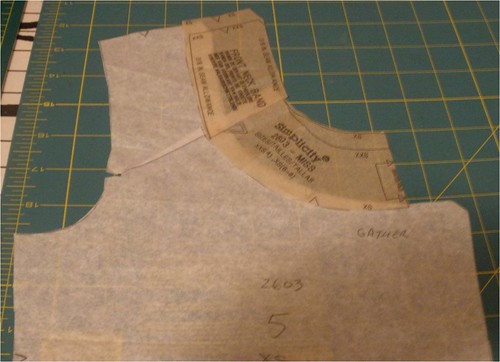
    • I read some of the others reviews and decided to follow their leads and not sew the elastic in the back neck area. Instead, I gathered this area down to 5”. Then I sewed the back collar facing to the neck seam so the facing would stay down on the inside. This created a very stable collar so I don't need to fuss when I put it on and it stays in place.
    • I deepened the armholes for both the Cardi and Top by 2cm (7/8") and the sleeves fitted in nicely.
    • I made View D of the Cardi Wrap so I can't do any of the wraps. I am wondering if I should shorten the cardi as I shortened the top by 5cm (2").

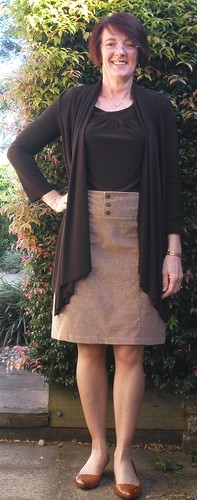
    So here is the top with my skirt from the Mini Wardrobe


    and now with the cardi


    Another one of the challenges for the 2010 SWAP at Stitcher's Guild was that a garment will feature embroidery, beads or sashiko.

    This is not something I have tried before and looking at the RTW it is everywhere.

    Now Alison, one of my sewing buddies has the Professional Touch Applicator Wand and has just used it to add the bling to her daugters dress and shoes.

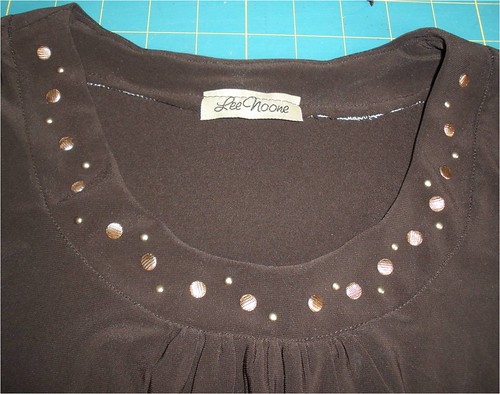
    Well Alison has kindly offered to let me test drive before I purcahse this Wand and to help me along further Alison also kindly purchased for me at the Craft Expo in March two packs of Nail Heads. Here is what I came up with yesterday playing with the nailheads and I think I will do this when I catch up with Alison again and when I figure out how to mark the pattern on the neckband so it looks correctly spaced.


    Oh I forgot to tell you that I have had some labels made to put into my garments. It is supposed to encourage me to finish my garments in a more professional way, unfortunately I can't find a brown sharpie to hide the fact that I used cream overlocking thread LOL.

    Thursday, April 15, 2010

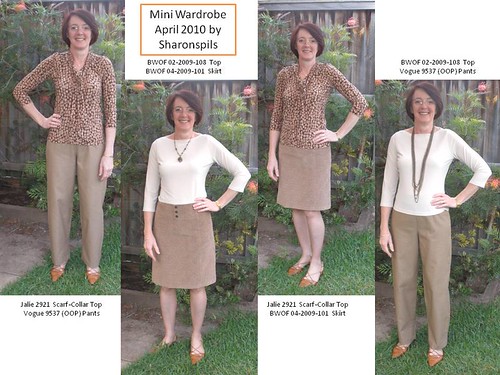
    Mini Wardrobe completed!!


    The last two items were:

    Jalie Scarf-Collar top which I told you about in the last post. I made it up in a knit purchased from The Fabric Store at Surry Hills last year. This is a great top and the instructions are so good.

    The jeans didn't happen because I didn't think I would have enough time to fit a new pattern as well. So my trusty pants pattern, Vogue 9537 was put into action and were made up in a cotton drill called String from Spotlight.

    The Pattern Reivews for both of these items are under "My Reviews" on the sidebar.

    Thursday, April 8, 2010

    My wonderful Easter break

    Wow, 2 posts in one week, so here goes.

    This year for once we didn't go away and DH had to work for two days as well, so I took advantage of 4 days of sewing, yippee.

    Now over on Pattern Review they are currently holding a Mini Wardrobe Competition and one of my goals this year was to complete at least 1 competition, so I am going to give it a go. Needless to say this has been going since 16 March and finishes on 15 April, however after last weekend I am halfway there so fingers crossed.

    This contest is to complete a 4-piece wardrobe in 4 weeks.

    There are quite a few combinations for this and I first of all started to think along the lines of a dress, jacket, top and skirt.

    I started with Simplicity 3775 which I had already traced off a size 4 at the shoulders and graded out to a 6 from the under arms and had done the following adjustments:

    • Round shoulder
    • Neck Gaposis
    • High round back
    • Sway back
    when I cut the rather wild knit fabric out on Friday morning the pieces looked rather small so I used my Croverpro to Chainstitch the bodice together and I am so glad I did as it was a bit too tight with the 1.5cm seam allowances.

    I ended up using 6mm seam allowances on the entire dress and this moved the front bands closer to the centre and the rest worked out perfectly.


    Then I was thinking of using the Simplicity Cardi as the Jacket but after discussing this with Alison I decided this wouldn't work with the dress. So back to 2 tops and 2 bottoms.

    On Saturday, Alison and I headed off to the ASG group at Alexandria and I cut out BWOF 04-2009-101 Skirt in a salt and pepper mini corduroy fabric that I purchased at an Industry Day at Martin & Savage quite a few years ago. The smallest size for this skirt is a 36 and I am a 34, however I didn't grade it down (still have to learn to do this) but thought with all the seams it should be okay. The only adjustment I did to start with was a swayback adjustment of 1.5cm.

    Once I stitched the front yokes using Deb Thompson's great tutorial I basted the remaining seams together then had some great help from Alison in fitting this. Essentially I made the side seams and back panel seams 2cm and left the front ones alone.

    Sunday started with adding the side and back yokes to the skirt and getting it ready for DH to level the hem that night.

    I then cut out BWOF 02-2009-108 in the cream Mercury Jersey that DM and I purchased from Lincraft back in February.

    I had already traced this pattern out and had done the following adjustments:

    • Added 1cm to the neck edge
    • Round shoulder 1.5cm
    • High round back 1cm
    • Gaposis on front 1cm
    • Reduced the sleeve cap by 2cm and redraw sleeve cap
    • Sway back adjustment of 1.5cm
    This went together really well finishing it on Monday.

    Here are both pieces being worn to work today.


    I have now traced off the Jalie Scraf-Collar Top and have started to trace off BWOF 04-2010-120 Jeans. I'm not sure about the Jeans as I haven't made Burda pants/trousers before, so I may end up making a pair of casual pants instead, need to think about this one a bit more as the time frame will be a major consideration if I want to complete this competition.

    Wednesday, April 7, 2010

    March Wrap-Up

    This is a bit late as last weekend was a major sewing weekend and I will share more about this in my next post.

    Now March didn't see any new garments started, but it did see 4 garments finished and here they are.

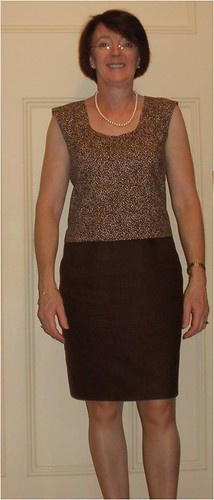
    First up is the brown linen straight skirt that was for the 2009 Swap that still needed hemming in January of this year.


    Yes, I am wearing the same top and accessories with it as this one


    As you can see, my wardrobe is rather limited.

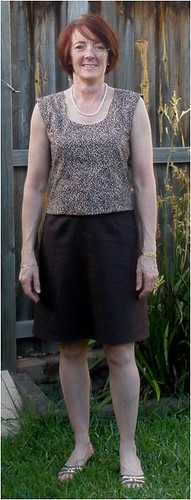
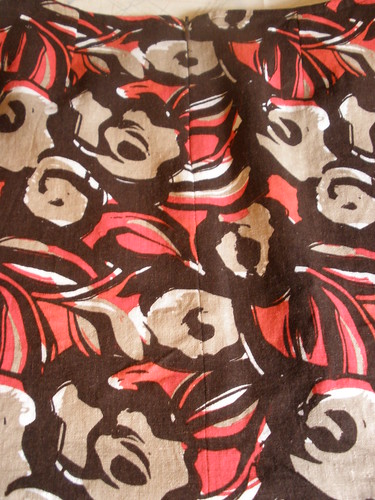
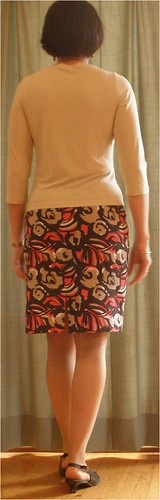
    Second on the list is the brown/coffee/coral linen that I showed you here. I used the same self drafted straight skirt pattern that I did for the brown linen above.

    One of the challenges for the 2010 SWAP at Stitcher's Guild was a matched print and I had never done one before. So I decided to challenge myself and match the centre back seam and using Nancy's great tutorial I am really pleased how it has turned out, what do you think?


    Now this skirt didn't progress much until I attended one of my ASG groups in February and I only managed to get it hemmed when I visited DM in March.


    Back


    You will have to wait for another day to find out about the top I am wearing LOL.

    The Third garment is the Top to go with the Simplicity Cardi that I made for my DM. I took this to her home the last weekend in March with my Coverpro to finish the hems and here is the final set.


    and drum roll please for the Fourth garment....... the LBD is now finished.


    Back view


    The sleeves didn't work, it appears that the wool that I used is a gabardine weave and has no give in it whatsoever and with the sleeves being very tight I had to change direction and make it sleeveless.

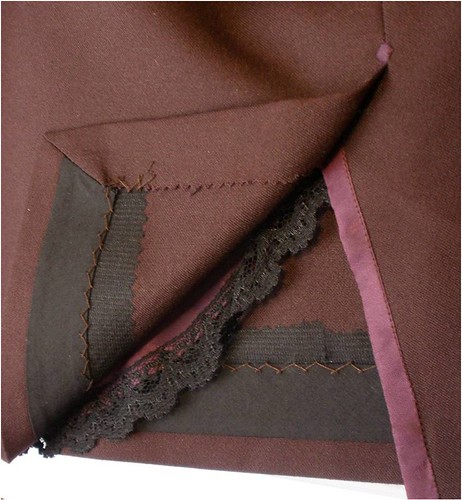
    The other thing I noticed when trying it on is that it seemed to be very close at the correct length already. Luckily when DH levelled the hem for me I had a scant 1.5cm hem to turn up so I purchased some 2cm bias tape to add to this and here you can see:

    • A strip of fusable interfacing fused from the hem fold with a pinked edged 1.5cm wider than the finished hem width. This make your hem a bit firmer and you can then stitch your hem in the safe knowledge that NONE of your stitches will show on the right side of your garment.
    • Finished hem

    • Mitred corner for the split

    • Hong Kong finish on the other side of the split

    • Lace attached to the lining

    • A Diamond stitched to the top of the split to help stabilise this spot.


    I also want to make a belt to go with this, if I can find abelt kit in one of the fabric stores.

    Here are the pattern adjustments that I made if you want to check them out.

    I'm still working on how to get better colours in my photos as the colour of the final dress IS the correct colour, however the lining and the diamond stitching close up shot is not.

    Lucily I have this fabric to make a Chanel Jacket with my ASG group in May.