This is what I have been up to since my last post, well sort of, I also have an orange linen top nearly finished that I cut out on 1 December, but more about that one later.
Again this year, I left it to the last minute to produce Christmas gifts, even though I knew very early in the year that this is what I would be making.
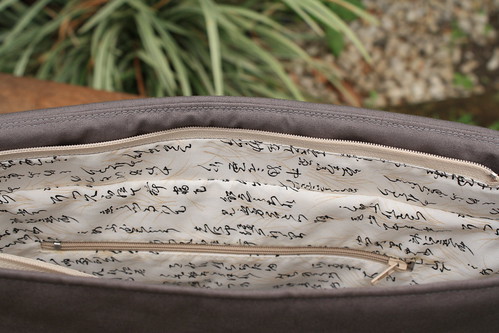
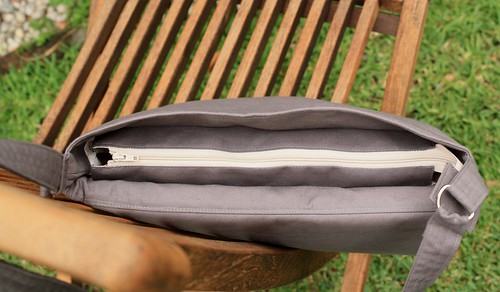
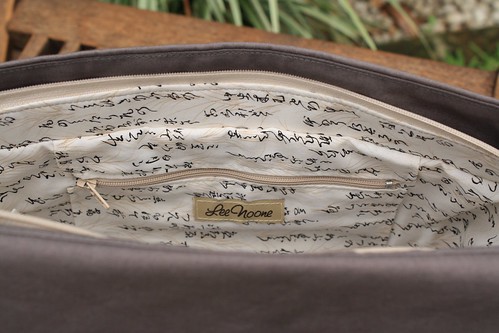
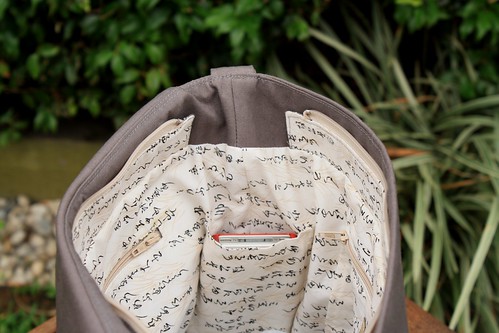
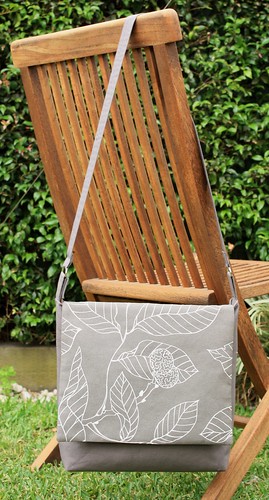
First up was the Spice of Life bag for my very good friend with the fabric purchased whilst we were at the ASG Convention in Adelaide. This is the 3rd time I have made this bag, so it was pretty straight forward.
Then it was time again to sew for the nieces and nephews and late last year I found this great tutorial for Circle Zip Earbud Pouch by Erin Erickson after seeing a whole lot of them on various blogs thinking they would be perfect for this Christmas. My friends can tell you that at every craft show I attend this year the search was on for themed fat quarters and the effort was very much appreciated by the recipients.
Lastly was a necklace for my Sister as she already knew that she was getting the bag so using some 10mm Black Rutifated Quartz and 8mm black beads I made this for her.
I also found via Pinterest this great tutorial for making a Necklace Display by Bea Graansma.
Hope you all had a wonderful Christmas and I plan on being back before the New Year!
Saturday, December 29, 2012
Wednesday, December 12, 2012
Riveria Summer Breeze and Giveaway
I have finally managed to try out one of the HotPatterns patterns that I won earlier this year and as predicted it is HP 1137 Riviera Summer Breeze Sleeveless Tops, the Tie-Front version from this pattern.
Not knowing what type of block Hot Patterns uses, I decided to make this one up with none of my normal adjustments and had it ready to sew at our fitting weekend with Angie.
I traced off a Size 8 as per my measurements on the envelope and found this steely blue wool/cotton blend knit in my stash that I purchased from an unnameable Brunswick distributor when the Aussie Pattern Review girls met up in Melbourne in 2010.
I found the instructions to be minimal, and even though I am Burda magazine sewer, the HotPatterns instructions seemed to be even less, e.g.
I found this pattern very long and took 12cm (5 7/8") off the length.
On reflection I probably chose the wrong size because I used a knit (which is also a suggested fabric) as the neck is very large and the side seams are too low and I have the bra showing. It is a very loose style and the tie belt is the only way you can get any shape into it.
This top will be donated as I am not comfortable in it and even if I went down a size this will not change the amount of fabric that is in the front of the top, there is just too much of it for my liking.
Now if any of you would like to have this pattern, please let me know in the comments and I will let you know who the lucky person is. Please be aware that I have cut off the instructions from the main sheet, but besides this the pattern is still intact as I traced of my pattern.
Not knowing what type of block Hot Patterns uses, I decided to make this one up with none of my normal adjustments and had it ready to sew at our fitting weekend with Angie.
I traced off a Size 8 as per my measurements on the envelope and found this steely blue wool/cotton blend knit in my stash that I purchased from an unnameable Brunswick distributor when the Aussie Pattern Review girls met up in Melbourne in 2010.
I found the instructions to be minimal, and even though I am Burda magazine sewer, the HotPatterns instructions seemed to be even less, e.g.
- there are two notches for the placement of the long tie, however for the short tie there is only one notch and of course I used the lower notch as the top placement when from what I worked out later it should have been the bottom placement,
- when it came to gathering the front piece there is no mention of what notches you match up or how much it gathers up to, there is a diagram, but it did do my head in getting there.
I basted this together and tried it on and the only change we made was to reduce the short belt end of the oval dart by 3.5cm (1 1/2").
I found this pattern very long and took 12cm (5 7/8") off the length.
On reflection I probably chose the wrong size because I used a knit (which is also a suggested fabric) as the neck is very large and the side seams are too low and I have the bra showing. It is a very loose style and the tie belt is the only way you can get any shape into it.
This top will be donated as I am not comfortable in it and even if I went down a size this will not change the amount of fabric that is in the front of the top, there is just too much of it for my liking.
Now if any of you would like to have this pattern, please let me know in the comments and I will let you know who the lucky person is. Please be aware that I have cut off the instructions from the main sheet, but besides this the pattern is still intact as I traced of my pattern.
Monday, December 3, 2012
Zipper Workshop
Back in October, Maria, Alison and I headed to Canberra for the day to attend a Zipper Workshop by Nicole Mallelieu at Addicted to Fabric.
Our requirement list had us purchase fabric, lining and zips for the Large Tote and Satchel.
After checking out the Nicole Malleliue Design - Made by You flicker group I fell in love with the all the different flaps that people had added to their Totes, so I headed off to Ikea and found this wonderful print and then managed to get a reasonable match in some quilting cotton for the remainder of the Tote and the lining.
The workshop consisted of 4 types of zippers which Nicole said we would probably only get 2 completed, maybe 3 but were given notes for all 4, which were:
and then proceeded to work on the Zipped Gusset for the top of the Tote.
Over the last month (I'm not sure where the time has gone) I have:
and this:
I'm not sure if you can see the black pins on the strap on the right hand side of the Tote above but this is where the bag is up to.
It was whilst I was trying to decide on the strap length, that I realised that no matter what length I made the strap the actual size of the Tote was not something I would ever use, it wears me which is not how I want my bags to be.
Now it is fortunate that when my darling Mum and Sister visited yesterday the Tote wasn't quite finished but my Sister did like it "quite a lot" so maybe this Tote has a new home already, I am waiting for the call back!
Our requirement list had us purchase fabric, lining and zips for the Large Tote and Satchel.
After checking out the Nicole Malleliue Design - Made by You flicker group I fell in love with the all the different flaps that people had added to their Totes, so I headed off to Ikea and found this wonderful print and then managed to get a reasonable match in some quilting cotton for the remainder of the Tote and the lining.
The workshop consisted of 4 types of zippers which Nicole said we would probably only get 2 completed, maybe 3 but were given notes for all 4, which were:
- Super Simple Zipper
- Exposed Zipper Pocket
- Lapped Zipper Pocket
- Zipped Gusset
and then proceeded to work on the Zipped Gusset for the top of the Tote.
Over the last month (I'm not sure where the time has gone) I have:
- fused the Tote first with Medium-Heavy Iron-on Interfacing and then put a layer of H640 Fusible Wadding Medium over the top using my Elna Press in both instances;
- Put the Lapped Zipper Pocket on the back of the Tote so the zip doesn't rub against my clothing;
- Added a zipper patched pocket to the opposite side of the Tote lining;
- Added a phone pocket on the end wall of the lining.
and this:
I'm not sure if you can see the black pins on the strap on the right hand side of the Tote above but this is where the bag is up to.
It was whilst I was trying to decide on the strap length, that I realised that no matter what length I made the strap the actual size of the Tote was not something I would ever use, it wears me which is not how I want my bags to be.
Now it is fortunate that when my darling Mum and Sister visited yesterday the Tote wasn't quite finished but my Sister did like it "quite a lot" so maybe this Tote has a new home already, I am waiting for the call back!
Tuesday, November 20, 2012
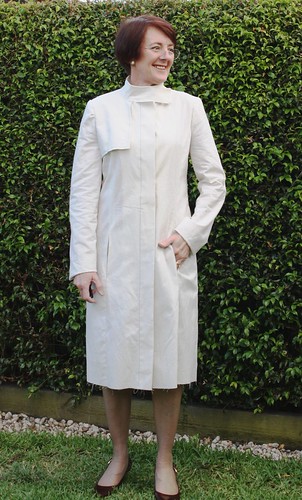
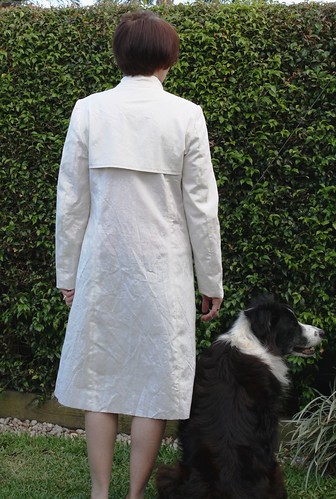
Trench progress
I'm happy to report that since my last post I have managed to achieve all that was on my list:
I've decided that I don't like the gap between the centre front and the collar and I'm also not so sure about the collar extension or how it sits when the Trench is open?
Last weekend my sewing buddies and I got to spend some more quality time with Angie Zimmerman getting our patterns fitted and this is what we have decided to do with the Trench:
I'm still reading magazines/books and watching DVD's however it now looks like I'm ready to cut out my fabric, but first I need to make the lining pattern as I didn't want to do this until I had checked the fit.
Trace the pattern from the magazine.Make a toile to ensure all is right.Decide if I want it to be double breasted as my RTW isn't?Decide on what zips I want to use and place my order with Zipperstop.Gather my bedtime reading from a number of Threads magazines to figure what else I need to do.
During my bedtime reading I read Threads Issue # 19, page 30 where David Page Coffin talks about "Stalking the Perfect Raincoat" and this made me realise that I wanted a hidden-button fly front as my closure as this is what is on my RTW Trench and I really like the clean lines.
So the I traced off the pattern and then found quite a few places that showed me how to do a concealed button front for a shirt, so using my RTW Trench as a guide I made the folds 5cm each. At the same time I also drafted the back storm panel.
Then it was time to cut out the Trench in calico to make sure it fitted and also to see if could understand the lovely Burda instructions.
A couple of notes I did make during construction were:
- Is there a better way to do the pockets? You sew the seam first and then fiddle with the pocket bags.
- Is there a better way to do the collar?
- Looks like the sleeve head has too much fullness in it for this type of fabric.
I've decided that I don't like the gap between the centre front and the collar and I'm also not so sure about the collar extension or how it sits when the Trench is open?
Last weekend my sewing buddies and I got to spend some more quality time with Angie Zimmerman getting our patterns fitted and this is what we have decided to do with the Trench:
- I can put the pockets in first (before I sew the seam), but I need to ensure that they line up perfectly when I sew the side seams.
- Well the way Burda does the collar is the tailored way, you live and learn. Angie did give me some more information for a better finish than the brief Burda instructions do.
- Angie did think that I got the sleeves in very well in the calico version and suggested I leave them as they are but looking at the large tuck on the sleeve in the first picture above I'm not so sure.
I'm still reading magazines/books and watching DVD's however it now looks like I'm ready to cut out my fabric, but first I need to make the lining pattern as I didn't want to do this until I had checked the fit.
Friday, November 16, 2012
SWAP 2013
I have been haunting Stitcher's Guild since September waiting for the 2013 SWAP Rules to be posted and here they are:
"Hurricane Sandy, site outtages and a fairly wide-spread sentiment among the members has convinced me to keep this year's rules simple and uncluttered.
We'll be following JenSA's suggestion to make two 4 or 5 piece collections, with a single other garment that can be worn with both capsules.
Each collection is either 3 tops and two bottoms, or 2 tops, 1 bottom, and 1 dress, which all form a cohesive group. The 11th garment should be a jacket or other piece that coordinates with both collections, both in style and color.
These collections can be for different occasions, or in different colorways, or simply reflect two very different styles or images.
There will be no requirement this year to use a particular fabric or pattern choice, no fussy print matching or need to master any new skill.
Sewing will begin December 26th, and all garments must be finished by April 30th, 2013. Muslins, pattern fitting and cutting may be started whenever you are ready.
One garment may be sewn before the official sewing start date, and one may be purchased or previously sewn."
So this means that your SWAP collection can have a total of 9, 10 or 11 pieces. As always there is a lot of discussion going on at Stitcher's Guild and some of the ladies even have a pretty good idea of how they are going to proceed.
JenSA's suggestion was made around the middle of October and quite a few of us really liked the idea, so I had started to play with my plan and had a pretty good idea what I was going to do, as long as I could work with the rules, and the answer is yes.
My SWAP plans consist of:
So who is going to join me?
"Hurricane Sandy, site outtages and a fairly wide-spread sentiment among the members has convinced me to keep this year's rules simple and uncluttered.
We'll be following JenSA's suggestion to make two 4 or 5 piece collections, with a single other garment that can be worn with both capsules.
Each collection is either 3 tops and two bottoms, or 2 tops, 1 bottom, and 1 dress, which all form a cohesive group. The 11th garment should be a jacket or other piece that coordinates with both collections, both in style and color.
These collections can be for different occasions, or in different colorways, or simply reflect two very different styles or images.
There will be no requirement this year to use a particular fabric or pattern choice, no fussy print matching or need to master any new skill.
Sewing will begin December 26th, and all garments must be finished by April 30th, 2013. Muslins, pattern fitting and cutting may be started whenever you are ready.
One garment may be sewn before the official sewing start date, and one may be purchased or previously sewn."
So this means that your SWAP collection can have a total of 9, 10 or 11 pieces. As always there is a lot of discussion going on at Stitcher's Guild and some of the ladies even have a pretty good idea of how they are going to proceed.
JenSA's suggestion was made around the middle of October and quite a few of us really liked the idea, so I had started to play with my plan and had a pretty good idea what I was going to do, as long as I could work with the rules, and the answer is yes.
My SWAP plans consist of:
- an evening collection
- an everyday collection
- with the all important cross over piece being the rain coat Trench.
So who is going to join me?
Saturday, November 3, 2012
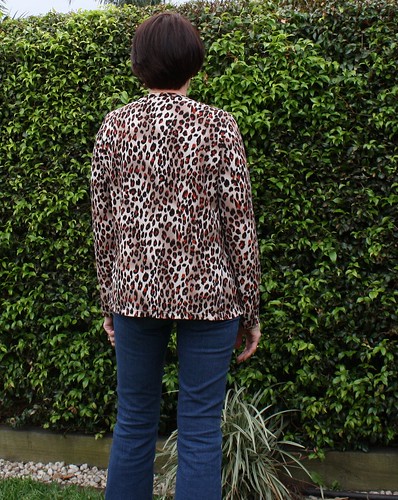
A lot more animal print
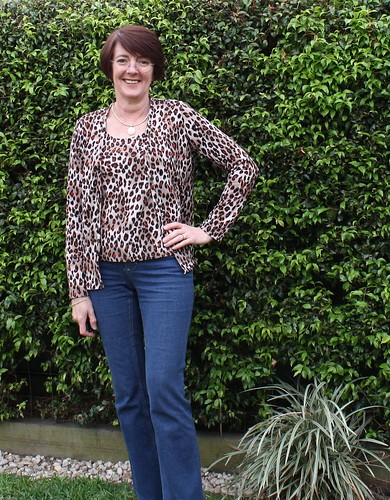
Here is the cardigan finished and like the t-shirt before it has all the alterations of the Fractured Knit cardigan except the FBA.
This is the first time that I have done buttonholes on a knit fabric which had me very nervous, however Suzanne told us to use tearaway underneath the band, and using the knit buttonhole on my Janome I was very pleased with the result.
Now Sew Hopeful did make a comment about my use of waxed thread, Burda have the perfect explanation for this Unsung Notion.
This is the first time that I have done buttonholes on a knit fabric which had me very nervous, however Suzanne told us to use tearaway underneath the band, and using the knit buttonhole on my Janome I was very pleased with the result.
Now Sew Hopeful did make a comment about my use of waxed thread, Burda have the perfect explanation for this Unsung Notion.
Sunday, October 28, 2012
A bit of animal print
This is the T-shirt from Jalie 2566 which I had cut out before I went to the ASG Convention, so it has all the same pattern changes as the Cardigan, except the FBA.
This fabric jumped out at me when we were leaving Pitt Trading back in May of this year and I have been wanting to make it up ever since and thought I only had enough for a cardigan, but with some fussy cutting managed to get this t-shirt out as well.
I didn't add the neckband as this fabric is a sweater knit and I couldn't get it to sit flat enough for my liking, so I simply overlocked (serged) the neck edge and turned it under and used my coverstitch to stitch it down.
I will do the FBA on this pattern as well as adding a bit of width to the sleeve hem as they are very snug.
The cardigan only needs the buttons sewn on and Alison did show me yesterday how do this by machine, but I like a thread shank on my buttons and also like to use a waxed thread, so by hand they will be sewn on.
This fabric jumped out at me when we were leaving Pitt Trading back in May of this year and I have been wanting to make it up ever since and thought I only had enough for a cardigan, but with some fussy cutting managed to get this t-shirt out as well.
I didn't add the neckband as this fabric is a sweater knit and I couldn't get it to sit flat enough for my liking, so I simply overlocked (serged) the neck edge and turned it under and used my coverstitch to stitch it down.
I will do the FBA on this pattern as well as adding a bit of width to the sleeve hem as they are very snug.
The cardigan only needs the buttons sewn on and Alison did show me yesterday how do this by machine, but I like a thread shank on my buttons and also like to use a waxed thread, so by hand they will be sewn on.
Subscribe to:
Posts (Atom)