
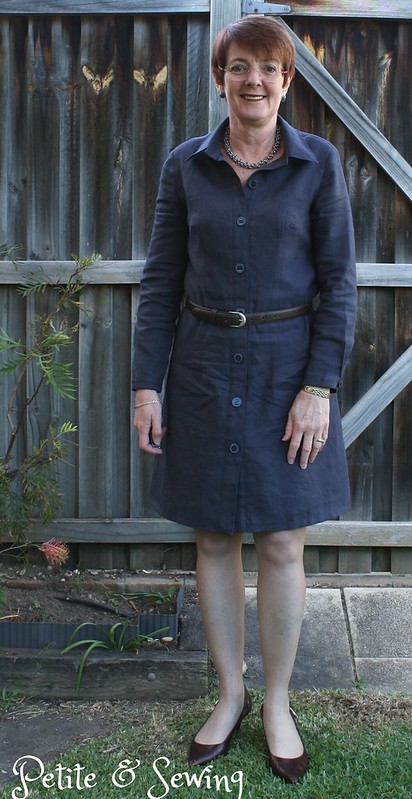
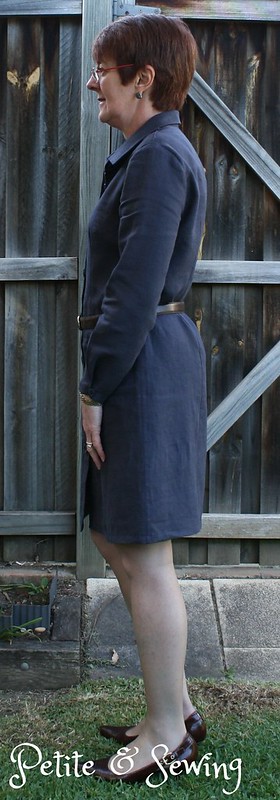
I used the same slate blue linen as my Navy skirt which I purchased from Tessuti in 2013 and seeing I had already made McCalls 5433 back here my main patterns adjustments were already done.
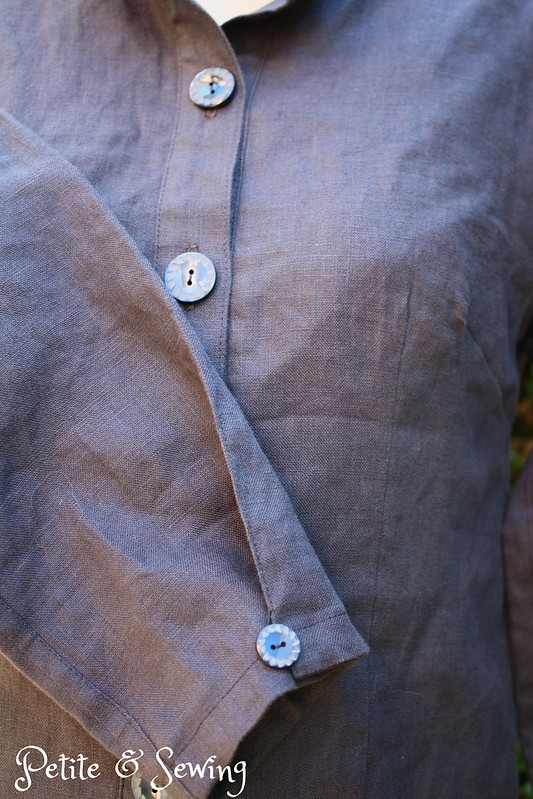
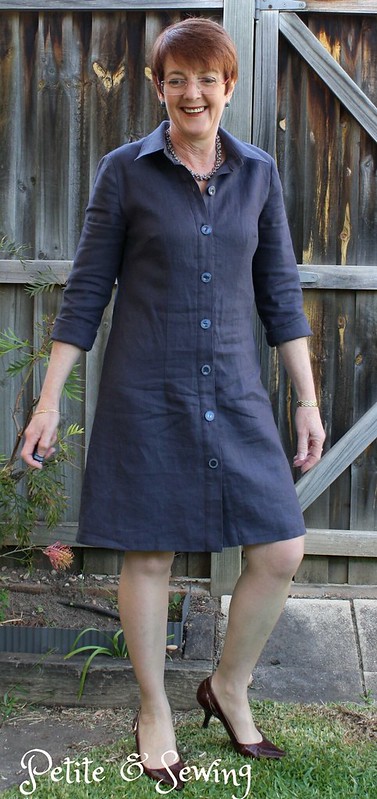
Just before I cut this out, Louise, from Seams Like Fun (and I had the pleasure of attending her class at the ASG Convention last month) posted Shirt Collars Made Easy. Of course this had me downloading the instructions as I have only completed one other shirt collar and any tips to make it easier I was keen to try.
For this version I was looking for it to be able to be worn alone during Spring and Autumn and even Winter with a light layer (spencer) underneath.
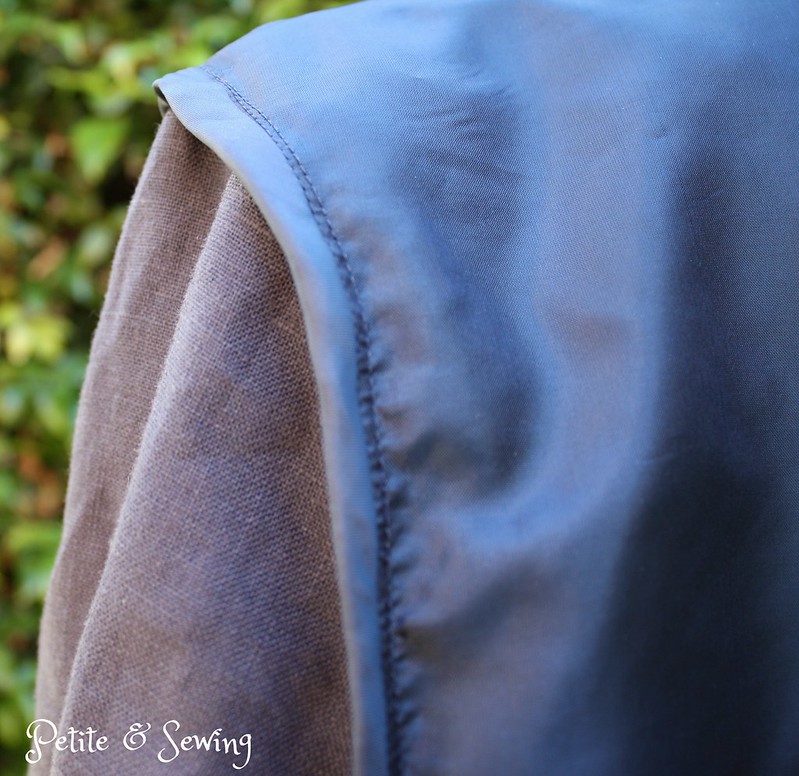
To give me a bit more warmth, I decided to line the body of the shirtmaker dress only as I wanted to roll up the sleeves so using the sleeves from view D I added 1.5cm to each side of the sleeve hem width as well as another 4cm to the length.
This was all cut out and fused (collar, collar stand and front bands) for our sewing weekend back in May.
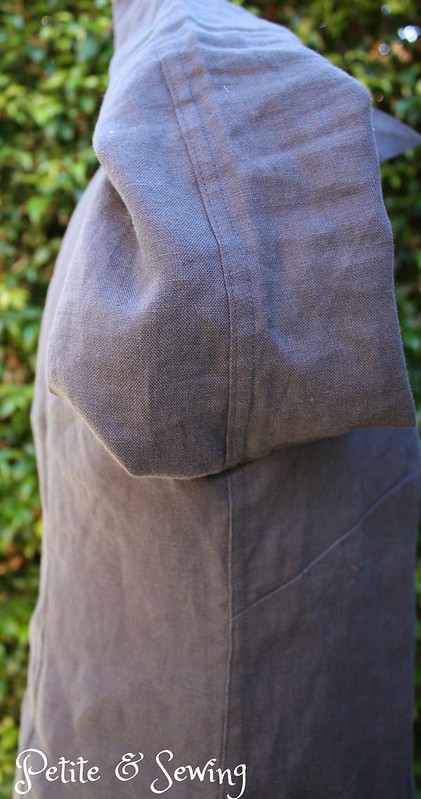
For some reason I decided to go all out and do flat felled seams on the side seams, the shoulders and the sleeves.
The lining has French seams and this was attached to the body of the dress after the dress length was finalised and before adding the front bands, so I could encase the edges.

The lining was then basted to the neck edge so I could add the collar stand.
Louise's instructions for the Shirt Collars Made Easy has the ends of the collar and collar stand on the fold so you end up with a centre back seam and hopefully better points.
 |
| Oops not quite matching! |
Now to be able to roll my sleeves up, the sleeve width at my cuff was not desirable. This time I found this great Threads article on Shape a Sleeve with this Easy Fold-Over Placket that provided the perfect solution.
Threads do suggest you make the vertical fold for the placket about 1/3 of the way from the underarm seam, however this put the fold right on my wrist bone which I didn't like, so my sleeve width was 28.5cm and I put my vertical fold at the half way mark which makes the fold toward the back of my sleeve.

Again the wonderful ladies at All Buttons Great and Small helped me choose the buttons and I again purchased the buttonholes from Mick at Quick Buttonhole Service.
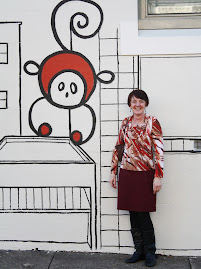
and now for some full length views:
 |
| I still might add some darts to the back! |


Now to find a triple belt and animal print bag that are in the inspiration picture!
******************
2014 Stash Out: 34.95 m
2014 Stash In: 48.75 m


19 comments:
I like that outfit too. Your wonderfully classic shirtmaker dress looks like the perfect base for some selective accessory shopping ;).
Thanks for the sleeve fastening tip, what a good idea for a garment that will be worn with sleeves rolled up or full length.
What an absolutely gorgeous shirt dress! I've never thought to line a shirt dress - thanks for the brilliant idea.
What a beautiful shirt dress, and I bet it feels yummy with that silky lining! It fits perfectly, congratulations on a creating what will surely be a well-loved wardrobe essential.
A great dress and the flat felled seams add an interesting touch. I've done shirt collars the same way before and the results are always nice and crisp.
Yes, yes, yes! It doesn't get much better than that. And thanks to you I have found the many benefits of lining linen.
Fabulous dress Sharon. I want to make something like yours one day. Very classic looking.
Your can't get more classic than this - lovely dress. Good luck with the accessory hunt.
So stylish! (as usual!). Thank you for all the collar and construction tips...including the Buttonhole guy! have a 4 shirts nearly finished...all except for buttonholes!!! (I can do buttonholes but I find it nervewracking! No going back once that cut it made!!)
Beautiful shirtmaker dress, and beautifully sewn. This will become a great wardrobe staple, I'm sure.
I love shirtmaker dresses and this is gorgeous. I've given up making them for myself because I'm just the wrong shape! Navy with brown accessories is a great colour combination and as always, you look great!
This is simply great, Sharon. Very well crafted with many delicious details. A shirtdress is a timeless classic. Very well done!
Lining a shirtdress had never occured to me before, what a great idea! I bet it feels very special to wear!
Lovely dress! A great base too for accessories.
Great looking dress and impeccably sewn as usual. A wonderful classic, too.
Fab looking dress - beautiful details!
Oh, I love it; classic and smart, and so beautifully tailored. I really like the button detail on the sleeve. You've done the lining so cleverly :)
Ooh, I am liking this very much. I've been seeing shirtdresses popping up everywhere - I have the fabric but not the pattern, so you've inspired me. I must get to All Buttons Great and Small!
fantastic job on the dress & to master all those buttonhoels, I'm not sure why buttonholes scare me when the machine does all the work lol!
Helen
Gorgeous! I'm so looking forward to our spring and finding fabric for a shirtdress. Thanks for the inspiration!!
Post a Comment