The workshop book is based on the Baby Lock Coverstitch models, however there were quite a few of us with the Janome Coverstitch and our teacher, Michelle was very knowledgeable about both brands of machines.
I love my Coverstitch and do use it for all my knit hems but I wanted to learn how to use it better as well as getting to understand the knit and woven binders I had purchased previously from Sharp Sewing Supplies.
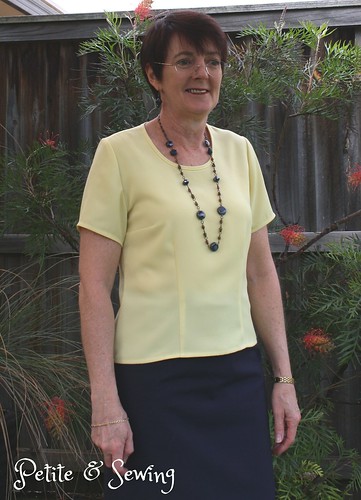
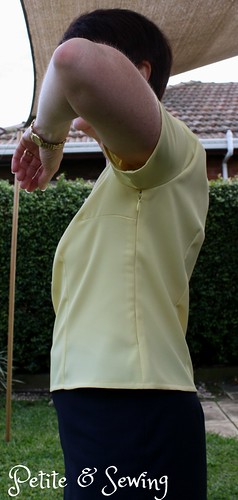
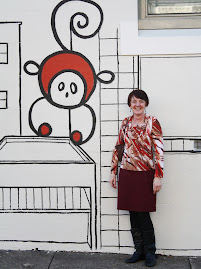
As you all know I love my TNT top pattern and had purchased the 3/4" woven binder (finished width) particularly for this blouse.
It did take me a little while to get it working and I was very lucky that Alison had taken her Coverstitch to our ASG Group at The Remnant Warehouse the other Saturday and I was able to play with the binder with some scraps of fabric on her binder whilst I was sewing the blouse together.
Once I got back home, I settled down with my machine to finish the construction of the blouse as follows:
- Sew the darts and press.
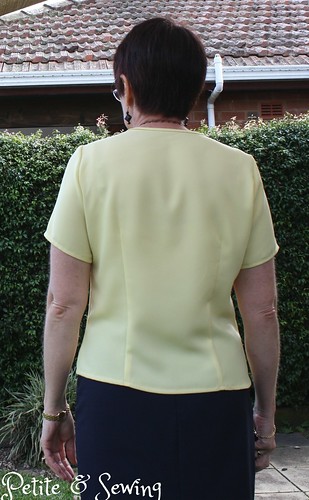
- Sew the right shoulder seam and press (leaving the left shoulder seam open).
- Edge stitched the blouse neckline.
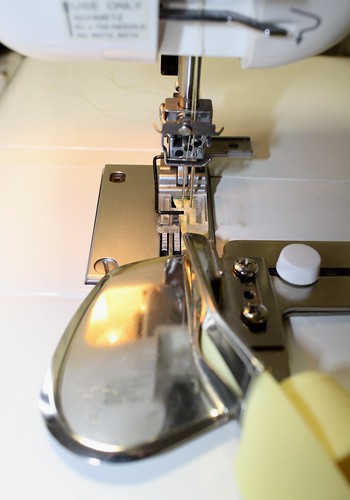
- Cut a 4cm bias strip which I then pressed in half as my binder is a A binder (raw edge) and I didn't want that sort of finish for this fabric.
- Attached my Janome extension table.
- Tightened the foot pressure knob to a height of 1cm.
- Threaded the Coverstitch for a chain stitch e.g. single needle.
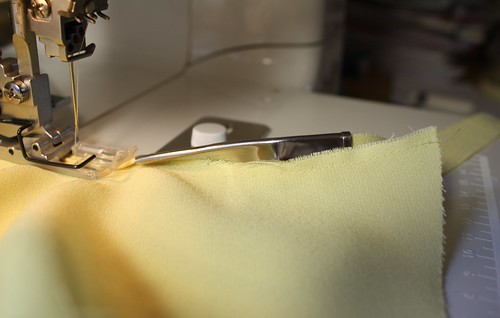
- Set up my binder and fed the bias strip through and under the needle and did a few stitches.
 |
| I still had the 2 needles in at this stage. |

- Sew the left shoulder seam and pressed, and then hand stitched the binding edges down at the shoulder seam as the binding ended up quite thick.
- Put in the invisible zip in the left side seam, sewed the right side seam, put in the sleeves and did the hems.
Debbie Cook has some fantastic information about Coverstitch machines on her blog.
I have also managed to sew something that fits with the Stashbusting theme this month, COLOUR!
Note: I have managed to get a photo of the neck binding for those interested.

******************
2014 Stash Out: 7.6 m
2014 Stash In: 31.75 m


9 comments:
Ermagerd Sharon..that looks fabulous! But I wanna see a closeup of that binding. I'm just about to enter the sewing room to do a toile with the exact same thing now that I have the correct binder. :)
Very clever, there is certainly an art to using the CS binders, which I have yet to master, so super impressed! This is such a lovely pattern on you, a great TNT and another lovely version.
Looks super ~ your Coverstitch machine is a little beauty ... J
The binder looks very useful - almost worth investing in a CS for that alone :).
The top looks lovely - a wonderful Easter top - and it sounds as though you had a very enjoyable day to boot.
Wow, I didn't know you could do so much with a cover stitch.
Thanks for enlightening me.
Love your top. I really do have binder envy. I just read and drooled over Alison's binding - I too would love to see a close up so that I can drool over yours as well. Gorgeous colour and a lovely shape.
Haha, binder envy! Me too! I know absolutely nothing about cover-stitching, but your top looks just beautiful!
Great basic top and the shade of yellow works well in your wardrobe. Thanks for the post on coverstitch machines too.
Love your blouse! I had a demo on a coverstitch machine once. Sighhh! Maybe one day I might get one.
Post a Comment